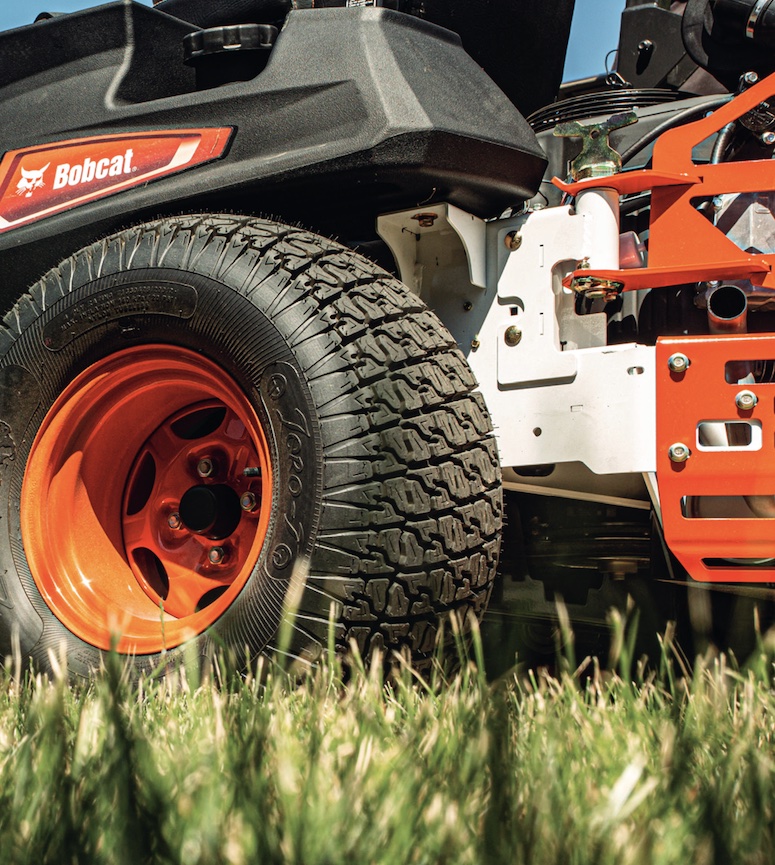
- Bobcat Lawn Mower Service Tools & Equipment
- Service Table for Bobcat Lawn Mower Won’t Start
- How to Check the Battery if Lawn Mower Won’t Start
- How to Examine the Fuel Filter
- How to Check the Air Filter
- How to Check the Spark Plug
- How to Inspect the Ignition System
- How to Test the Carburetor
- How to Check the Oil Level
- How to Check the Safety Switch
- Bobcat Lawn Mower Won’t Start F.A.Q.
When your Bobcat mower won’t start, it can be frustrating and inconvenient, but with the right troubleshooting techniques, you can diagnose the issue and get your mower up and running again. In this guide, we will provide step-by-step instructions on how to troubleshoot common problems that may prevent your Bobcat lawn mower from starting.
Whether it’s an issue with the battery, spark plug, fuel system, or safety switches, we’ll walk you through the process of identifying the problem and suggesting possible solutions. Let’s get your Bobcat lawn mower back to its peak performance so you can get back to mowing with ease.
Bobcat Lawn Mower Service Tools & Equipment
To troubleshoot a Bobcat lawn mower that won’t start, you will need the following tools and equipment:
- Socket set: A socket set with various sizes of sockets to remove bolts and nuts.
- Screwdrivers: Both flat-head and Phillips-head screwdrivers for removing screws and fasteners.
- Pliers: Regular pliers and needle-nose pliers for gripping and maneuvering small parts.
- Multimeter: A digital multimeter to test electrical components and circuits for continuity and voltage.
- Spark plug wrench: A spark plug wrench to remove and inspect the spark plug.
- Fuel pressure gauge: To check the fuel system’s pressure and diagnose any fuel-related issues.
- Fuel container: To collect fuel samples for inspection.
- Fuel line clamp: To stop the flow of fuel while inspecting the fuel system.
- Safety glasses and gloves: For protection while working with the mower’s engine and components.
- Air compressor or air blower: To clean debris and dust from the mower’s engine and components.
- Service manual: The Bobcat lawn mower’s service manual will provide specific instructions and specifications for troubleshooting and maintenance.
Having these tools on hand will help you efficiently diagnose and solve the issues preventing your Bobcat lawn mower from starting.
Always follow proper safety precautions and refer to the service manual for accurate instructions.
Service Table for Bobcat Lawn Mower Won’t Start
Here’s a simplified service table with three columns for troubleshooting the Bobcat Lawn Mower Won’t Start issue:
| Problem | Possible Causes | Recommended Solutions |
|---|---|---|
| Engine Doesn’t Crank | Dead battery | Charge or replace the battery. |
| Faulty starter motor | Repair or replace the starter motor. | |
| Faulty safety switch | Repair or replace faulty safety switches. | |
| Engine Cranks But Won’t Start | No fuel or stale fuel | Refill with fresh, clean fuel. |
| Clogged fuel filter | Replace the fuel filter if clogged. | |
| Faulty spark plug | Clean or replace the spark plug. | |
| Choke not engaged properly | Adjust the choke if necessary. | |
| Ignition system issues | Repair or replace faulty ignition parts. | |
| Engine Starts But Stalls | Dirty air filter | Clean or replace the air filter. |
| Carburetor problems | Clean or rebuild the carburetor. | |
| Low engine oil level | Refill the engine oil if low. | |
| Water in fuel | Use a fuel additive to remove water. | |
| Engine Overheats | Low coolant level | Refill the coolant if low. |
| Clogged cooling fins | Clean the cooling fins. | |
| Faulty thermostat | Replace the thermostat if faulty. | |
| Damaged water pump | Repair or replace the water pump. |
This service table provides a quick reference for troubleshooting common issues related to the Bobcat lawn mower not starting. For detailed instructions and specific steps, it is recommended to consult the Bobcat lawn mower’s service manual or seek the assistance of a qualified technician.
How to Check the Battery if Lawn Mower Won’t Start
To check the battery of your Bobcat lawn mower when it won’t start, follow these step-by-step instructions:
- Safety first: Ensure the lawn mower is parked on a flat and level surface. Engage the parking brake, turn off the engine, and remove the key from the ignition to prevent any accidental start-ups.
- Locate the battery: Depending on your Bobcat lawn mower model, the battery can usually be found under the seat or in the engine compartment. Refer to your owner’s manual for the exact location.
- Inspect the battery terminals: Check the battery terminals for signs of corrosion, dirt, or loose connections. Corrosion can interfere with the flow of electricity, leading to starting issues.
- Clean the battery terminals: If you notice any corrosion or dirt on the battery terminals, use a wire brush or a battery terminal cleaner to gently clean them. Be sure to wear gloves and eye protection while doing this.
- Check the battery voltage: Use a multimeter to measure the voltage of the battery. A fully charged 12-volt battery should read around 12.6 to 12.8 volts. If the voltage is significantly lower, the battery may be discharged.
- Charge the battery: If the battery voltage is low, use an appropriate battery charger to recharge the battery. Follow the manufacturer’s instructions for the charger and ensure it is compatible with your battery type.
- Load test the battery (optional): If you have a load tester, you can perform a load test to check the battery’s ability to hold a charge under load. This can help determine if the battery needs replacement.
- Check battery condition: If the battery is old or has been repeatedly discharged and recharged without holding a charge, it may need replacement.
- Reinstall the battery: After cleaning and charging the battery (if needed), reconnect the battery terminals securely, ensuring the positive terminal (+) is connected to the positive post on the battery and the negative terminal (-) to the negative post.
- Turn on the ignition: Turn the ignition key to the “ON” position and check if the lights on the dashboard or control panel illuminate. If they do, the battery is supplying power to the electrical system.
Remember that while troubleshooting the battery, safety precautions should be followed, and if you’re unsure about any step, it’s best to consult a qualified technician or seek professional help to avoid any accidents or damage to the lawn mower.
How to Examine the Fuel Filter
To examine the fuel filter on your Bobcat lawn mower when it won’t start, follow these step-by-step instructions:
- Locate the fuel filter: The fuel filter is typically located between the fuel tank and the engine, along the fuel line. Refer to your Bobcat lawn mower’s owner’s manual to find the exact location.
- Identify the type of fuel filter: Bobcat lawn mowers may have either an in-line fuel filter or an in-tank fuel filter. In-line fuel filters are typically cylindrical or rectangular and are installed along the fuel line. In-tank fuel filters are located inside the fuel tank and are accessible after removing the fuel cap.
- Inspect the fuel filter: Check the fuel filter for any signs of dirt, debris, or clogs. A clogged fuel filter can restrict fuel flow to the engine, causing starting issues.
- Replace the fuel filter (if needed): If the fuel filter is visibly dirty or clogged, it’s best to replace it. In-line fuel filters can be disconnected by loosening the hose clamps on both sides and sliding the filter off the fuel line. In-tank fuel filters may require removing the fuel tank cap and using a fuel line removal tool to detach the filter from the fuel line.
- Dispose of the old filter properly: If you’re replacing the fuel filter, make sure to dispose of the old filter in accordance with local regulations.
- Install the new fuel filter: Slide the new fuel filter onto the fuel line and tighten the hose clamps (for in-line filters) or reconnect the fuel line to the new filter (for in-tank filters).
- Check for fuel leaks: Once the new fuel filter is installed, check for any fuel leaks around the connections. Tighten the hose clamps or connections as needed.
- Refill the fuel tank: If you had to remove the fuel tank cap to access the in-tank filter, make sure to refit and tighten the fuel tank cap securely.
- Try starting the lawn mower: Turn the ignition key to the “ON” position and attempt to start the lawn mower. If the fuel filter was the cause of the starting issue, the engine should start and run smoothly.
If examining the fuel filter doesn’t resolve the starting issue, further troubleshooting may be necessary, and it’s recommended to consult a qualified technician or seek professional help to identify and fix the problem.
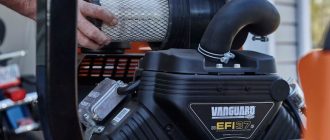
How to Check the Air Filter
To check the air filter on your Bobcat lawn mower when it won’t start, follow these step-by-step instructions:
- Safety first: Ensure the lawn mower is parked on a flat and level surface. Engage the parking brake, turn off the engine, and remove the key from the ignition to prevent any accidental start-ups.
- Locate the air filter housing: The air filter housing is usually located on the side or top of the lawn mower’s engine. It is a rectangular or cylindrical box with a cover that houses the air filter.
- Remove the air filter cover: Depending on the model of your Bobcat lawn mower, the air filter cover can be secured with clips, screws, or wing nuts. Use the appropriate tool to loosen and remove the fasteners.
- Take out the air filter: Carefully lift the air filter out of the housing. The air filter is usually made of paper or foam and may have a rubber gasket around the edges.
- Inspect the air filter: Check the condition of the air filter for dirt, debris, or damage. A dirty or clogged air filter can restrict airflow to the engine, causing starting issues.
- Clean or replace the air filter (if needed): If the air filter is visibly dirty or clogged, it’s essential to clean or replace it. Foam air filters can be washed with mild soap and water, while paper air filters are generally disposable and should be replaced.
- Clean the air filter housing: If the air filter was dirty, take a moment to clean out any debris or dirt from the air filter housing. Use compressed air or a soft brush to remove any particles.
- Reinstall the air filter: Place the cleaned or new air filter back into the air filter housing, ensuring it fits snugly.
- Secure the air filter cover: Carefully reattach the air filter cover and fasten it securely with the clips, screws, or wing nuts.
- Try starting the lawn mower: Turn the ignition key to the “ON” position and attempt to start the lawn mower. If the air filter was the cause of the starting issue, the engine should start and run smoothly.
Checking and maintaining the air filter regularly is essential for the proper functioning of your lawn mower.
If the issue persists or the lawn mower still won’t start after checking the air filter, additional troubleshooting may be necessary, and it’s recommended to consult a qualified technician or seek professional help to identify and fix the problem.
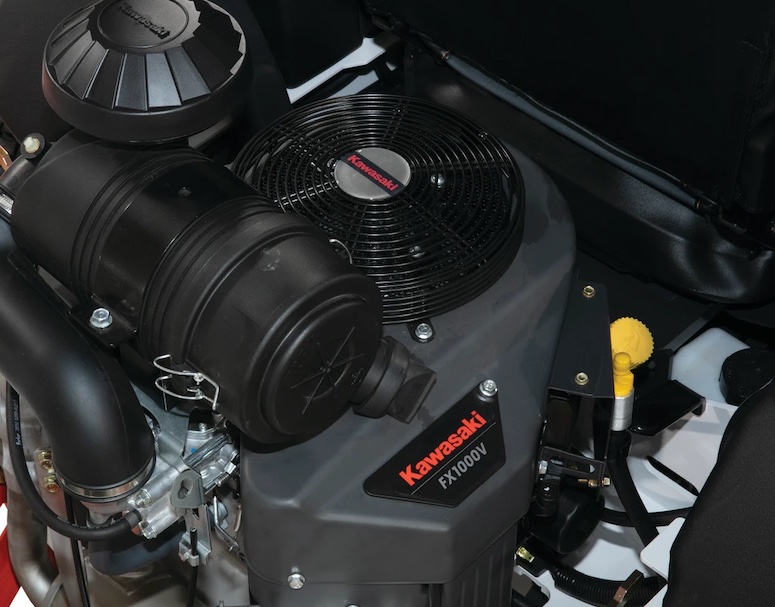
How to Check the Spark Plug
To inspect the spark plug on your Bobcat lawn mower when it won’t start, follow these step-by-step instructions:
- Locate the spark plug: The spark plug is typically located on the side of the engine, attached to a thick wire. It has a metal hexagonal or round top with a ceramic insulator at the end.
- Remove the spark plug wire: Firmly grasp the spark plug wire boot (the rubber part) near the spark plug’s base. Twist and pull the boot to disconnect it from the spark plug. Be careful not to pull the wire itself, as it can damage the wire.
- Remove the spark plug: Use a spark plug socket and a ratchet wrench to loosen and remove the spark plug from the engine. Turn it counterclockwise until it comes loose, and then unscrew it by hand.
- Inspect the spark plug: Examine the spark plug’s condition. Look for any signs of damage, such as cracks, wear, or fouling. The spark plug’s electrode (the small metal piece at the end) should be clean and not excessively worn.
- Clean the spark plug (if needed): If the spark plug appears dirty or fouled, you can clean it with a wire brush or a spark plug cleaner. Gently remove any deposits or carbon buildup from the electrode and the insulator.
- Check the spark plug gap: Using a spark plug gap gauge, measure the distance between the center electrode and the ground electrode. Refer to your lawn mower’s manual for the correct gap specification. If the gap is too wide or too narrow, adjust it by carefully bending the ground electrode.
- Inspect the spark plug wire: While the spark plug is removed, inspect the spark plug wire for any damage or wear. If the wire is damaged or cracked, it should be replaced.
- Reinstall the spark plug: Carefully thread the spark plug back into the engine by hand to avoid cross-threading. Once it is finger-tight, use the spark plug socket and ratchet wrench to tighten it snugly. Do not overtighten.
- Reconnect the spark plug wire: Push the spark plug wire boot back onto the spark plug until it clicks into place.
- Try starting the lawn mower: Turn the ignition key to the “ON” position and attempt to start the lawn mower. If the spark plug was the cause of the starting issue, the engine should start and run smoothly.
Inspecting the spark plug regularly and ensuring it is in good condition is essential for proper engine performance. If the lawn mower still won’t start after inspecting and cleaning the spark plug, further troubleshooting may be necessary, and it’s recommended to consult a qualified technician or seek professional help to diagnose and resolve the issue.
How to Inspect the Ignition System
To inspect the ignition system on your Bobcat lawn mower when it won’t start, follow these step-by-step instructions:
- Locate the ignition components: The ignition system includes several components that you need to inspect, such as the ignition coil, spark plug wire, ignition switch, and safety switches.
- Inspect the spark plug wire: Start by checking the spark plug wire for any damage, cracks, or wear. Make sure the wire is securely connected to both the spark plug and the ignition coil.
- Check the ignition coil: The ignition coil is responsible for producing the high-voltage spark that ignites the air-fuel mixture in the engine. Inspect the ignition coil for any physical damage, such as cracks or signs of overheating.
- Test the ignition coil (optional): If you have a multimeter, you can perform a simple test to check the continuity and resistance of the ignition coil. Refer to your lawn mower’s manual for the specific resistance values to ensure the coil is within the correct range.
- Inspect the ignition switch: Ensure that the ignition switch is functioning correctly. Turn the key to the “ON” position and listen for any clicks or sounds indicating that the switch is engaging properly.
- Check the safety switches: Some lawn mowers have safety switches that prevent the engine from starting if certain conditions are not met, such as the seat safety switch or the blade engagement safety switch. Make sure these switches are in their proper positions and not damaged.
- Inspect the wiring: Check all the wiring in the ignition system for any loose connections, frayed wires, or corrosion. Secure any loose connections and repair or replace damaged wiring.
- Look for signs of moisture or debris: Inspect the ignition components for signs of moisture or debris that could be interfering with the electrical connections.
- Reassemble and test: Once you have completed the inspection and any necessary repairs, reassemble all the components and try starting the lawn mower again. If the ignition system was the cause of the starting issue, the engine should start and run smoothly.
Inspecting the ignition system is crucial for diagnosing starting issues in your lawn mower. If the lawn mower still won’t start after inspecting the ignition system, further troubleshooting may be necessary, and it’s recommended to consult a qualified technician or seek professional help to diagnose and resolve the issue.
How to Test the Carburetor
To test the carburetor on your Bobcat lawn mower when it won’t start, follow these step-by-step instructions:
- Locate the carburetor: The carburetor is typically located near the engine’s intake manifold and is connected to the air filter housing and fuel lines.
- Check for fuel: Verify that there is sufficient fuel in the fuel tank. If the fuel level is low, fill the tank with fresh, clean gasoline.
- Inspect the fuel lines: Check the fuel lines for any signs of damage, cracks, or blockages. Replace any damaged or clogged fuel lines.
- Check the fuel filter: Locate the fuel filter and inspect it for debris or blockages. If the fuel filter is dirty or clogged, replace it with a new one.
- Prime the carburetor (if applicable): Some lawn mowers have a primer bulb that you need to press several times to draw fuel into the carburetor. Press the primer bulb until you feel resistance.
- Choke (if applicable): If your lawn mower has a choke lever, move it to the “choke” position to enrich the fuel-air mixture for easier starting.
- Attempt to start the engine: Try starting the lawn mower as you normally would. If the engine still doesn’t start, proceed to the next step.
- Remove the air filter: Take off the air filter cover and remove the air filter element. Inspect the air filter for dirt, debris, or clogs. Clean or replace the air filter if necessary.
- Spray carburetor cleaner: With the air filter removed, spray a small amount of carburetor cleaner directly into the carburetor throat.
- Attempt to start the engine again: Try starting the lawn mower once more. If the engine starts briefly after spraying the carburetor cleaner, it indicates a fuel delivery issue, possibly a clogged carburetor.
- Clean or rebuild the carburetor: If the engine starts briefly with the carburetor cleaner but won’t run consistently, it’s likely that the carburetor is clogged or needs adjustment. Consider cleaning the carburetor with carburetor cleaner or, if necessary, rebuild the carburetor using a carburetor rebuild kit.
- Seek professional help: If you are unsure about cleaning or rebuilding the carburetor or if the issue persists even after attempting these steps, it’s best to seek assistance from a qualified lawn mower technician or professional service center.
Testing and troubleshooting the carburetor can often help identify starting issues in your lawn mower.
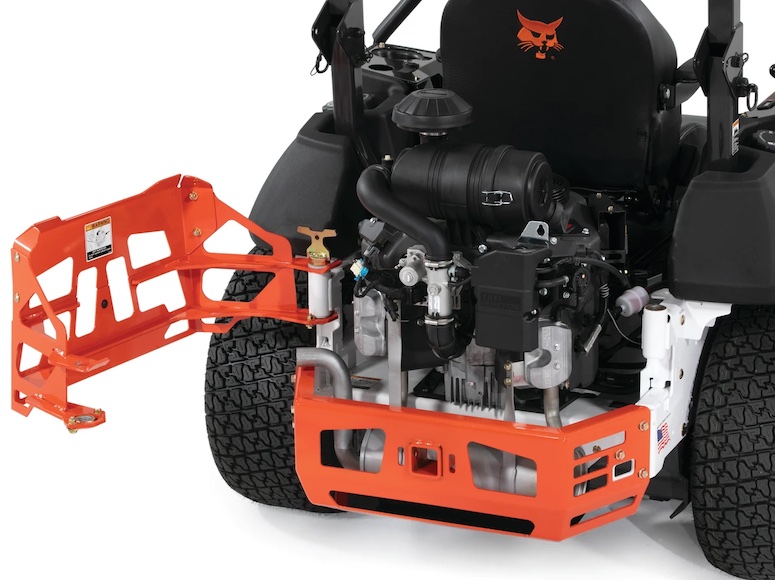
Keep in mind that modern lawn mowers may have fuel injection systems instead of carburetors, in which case, you may need specialized equipment and knowledge to diagnose and repair the issue.
How to Check the Oil Level
To check the engine oil level on your Bobcat lawn mower when it won’t start, follow these step-by-step instructions:
- Locate the engine oil dipstick: The engine oil dipstick is usually a brightly colored, long, and slender stick attached to the engine block. It may have a loop or handle for easy removal.
- Remove the dipstick: Pull the dipstick out of its tube. Wipe the oil off the end of the dipstick with a clean cloth or paper towel.
- Reinsert the dipstick: Fully insert the dipstick back into its tube until it’s seated properly.
- Check the oil level: Remove the dipstick again and observe the oil level indicator on the end of the dipstick. The dipstick will have two marks, usually “Full” and “Add” or “Low.” The oil level should be between these two marks.
- Interpret the reading: If the oil level is at or just below the “Add” or “Low” mark, it indicates that the engine oil is low and needs to be topped up. If the oil level is below the “Add” mark or not visible on the dipstick, the engine may be critically low on oil.
- Add engine oil (if necessary): If the oil level is low, add the appropriate type and grade of engine oil recommended for your lawn mower. Slowly pour small amounts of oil into the engine oil filler neck and recheck the oil level with the dipstick until it reaches the “Full” mark.
- Avoid overfilling: It’s essential not to overfill the engine with oil, as this can cause damage to the engine or result in oil leaks.
- Reinsert the dipstick: Once the oil level is correct, fully insert the dipstick back into its tube until it’s seated properly.
- Verify the reading: Remove the dipstick again and verify that the oil level is now within the “Full” and “Add” marks.
- Clean up: Wipe off any spilled oil and securely close the oil filler cap.
Checking the engine oil level is a vital step in maintaining your lawn mower’s engine health and ensuring proper operation. If the engine oil level is correct, but the lawn mower still won’t start, there may be other issues contributing to the problem, and further troubleshooting will be required.
How to Check the Safety Switch
To test a Bobcat lawn mower safety switch, follow these step-by-step instructions:
- Preparation: Ensure the lawn mower is on a flat, level surface, the parking brake is engaged, the engine is turned off, and the key is removed from the ignition to prevent any accidental start-ups.
- Locate the safety switches: Bobcat lawn mowers typically have multiple safety switches, including the seat switch, brake/clutch switch, and blade engagement switch. Identify the locations of these switches on your specific model.
- Seat switch test: a. Sit on the operator’s seat and engage the parking brake. b. Attempt to start the lawn mower while remaining seated. If the engine does not crank, the seat switch is likely functioning correctly.
- Brake/Clutch switch test: a. Depress the brake pedal or engage the clutch. b. While holding the brake pedal or clutch in, attempt to start the lawn mower. If the engine does not crank, the brake/clutch switch is likely working correctly.
- Blade engagement switch test: a. Ensure the parking brake is engaged and the engine is off. b. Engage the blade engagement lever or switch. c. Attempt to start the lawn mower. The engine should not crank while the blade engagement switch is engaged. If the engine cranks, the blade engagement switch may be faulty.
- Bypass test (optional): a. In some cases, you can temporarily bypass the safety switches for diagnostic purposes only. b. Consult the lawn mower’s manual or contact a professional technician to learn how to safely bypass the safety switches.
- Inspect the switches: a. Visually inspect each safety switch for any visible damage, loose wires, or loose connections. b. Ensure the switches are clean and free from debris or corrosion.
- Testing continuity (if necessary): a. If the safety switches appear to be in good condition but the lawn mower still won’t start, you can use a multimeter to test for continuity. b. Set the multimeter to the resistance or continuity mode. c. Disconnect the wires from the safety switch being tested. d. Touch the multimeter probes to the terminals of the switch. If the switch is functioning correctly, the multimeter should display continuity (or a low resistance reading). If there is no continuity, the switch may be faulty.
Note: Safety switches are crucial for operator safety and the proper functioning of the lawn mower. If you are not confident in your ability to test the safety switches, or if you suspect any issues, it’s recommended to seek assistance from a qualified lawn mower technician or authorized service center.
Bobcat Lawn Mower Won’t Start F.A.Q.
Frequently Asked Questions (FAQ) for Bobcat Lawn Mower Won’t Start:
Q: Why won’t my Bobcat lawn mower start?
A: There could be various reasons for a Bobcat lawn mower not starting. Common issues include a dead battery, fuel-related problems, ignition system malfunctions, or safety switch failures.
Q: How can I determine if the battery is the problem?
A: To check the battery, make sure it is fully charged and in good condition. Test the battery voltage using a multimeter. If the voltage is low or the battery is not holding a charge, it may need to be recharged or replaced.
Q: What should I do if my lawn mower has fuel-related issues?
A: Check the fuel tank for proper fuel level and make sure there is clean, fresh fuel. Inspect the fuel filter and fuel lines for clogs or blockages. Additionally, check the carburetor for any dirt or debris that may be causing fuel flow problems.
Q: How do I know if the spark plug is the culprit?
A: Remove the spark plug and inspect its condition. If it is fouled, corroded, or worn out, it may need to be cleaned or replaced. Additionally, check the spark plug wire for any damage.
Q: Can a faulty ignition system cause starting problems?
A: Yes, a malfunctioning ignition system, such as a bad ignition coil or ignition switch, can prevent the lawn mower from starting. Inspect the ignition components and test them using a multimeter if necessary.
Q: What do I do if the safety switches are not working?
A: If any of the safety switches, such as the seat switch or blade engagement switch, are not functioning correctly, it can prevent the lawn mower from starting. Inspect the switches for damage or loose connections and replace any faulty switches.
Q: Is it safe to bypass the safety switches for testing?
A: Bypassing safety switches should only be done for diagnostic purposes and not for regular operation. It is essential to prioritize safety, so avoid bypassing switches during normal use.
Q: When should I seek professional help for troubleshooting?
A: If you have performed basic checks and troubleshooting steps, but the lawn mower still won’t start, or if you are unsure of the cause of the issue, it’s best to seek assistance from a qualified lawn mower technician or authorized service center.
Q: How often should I perform maintenance to prevent starting issues?
A: Regular maintenance is crucial to prevent starting problems. Follow the manufacturer’s recommended maintenance schedule, including oil changes, air filter replacement, spark plug inspection, and fuel system cleaning.
Q: Can bad fuel quality affect my lawn mower’s starting?
A: Yes, using old or contaminated fuel can lead to starting issues. Always use fresh, clean fuel to ensure proper engine performance.
Q: Why is it important to record details of the troubleshooting process?
A: Keeping a record of troubleshooting details, such as observations, tests performed, and parts replaced, can help track the progress of repairs and provide valuable information to technicians if professional help is needed.
Q: What should I do if I’ve tried all troubleshooting steps and my lawn mower still won’t start?
A: If you’ve attempted all the troubleshooting steps and the lawn mower still won’t start, it’s recommended to seek help from a qualified lawn mower technician or an authorized Bobcat service center. They have the expertise and tools to diagnose and fix more complex issues.


How do I test the safety switches on my Bobcat lawn mower?
To test the safety switches, follow the step-by-step instructions provided in the troubleshooting guide. Test each safety switch, including the seat switch, brake/clutch switch, and blade engagement switch, to ensure they are working correctly.
Can a faulty safety switch prevent the lawn mower from starting?
Yes, safety switches are designed to prevent the engine from starting if certain conditions are not met, such as the seat not being occupied, the brake not engaged, or the blade engagement lever engaged. If any safety switch is malfunctioning, it may prevent the mower from starting.
What should I do if the engine cranks but won’t start?
If the engine cranks but won’t start, check the fuel supply, ensure there is enough fuel in the tank, and examine the fuel filter for clogs. Additionally, inspect the spark plug for fouling and verify that the ignition system is functioning correctly.
How often should I replace the air filter on my Bobcat lawn mower?
The air filter should be checked regularly and replaced every 25 to 50 operating hours or as recommended in the lawn mower’s manual. A clogged air filter can restrict airflow & affect engine performance.