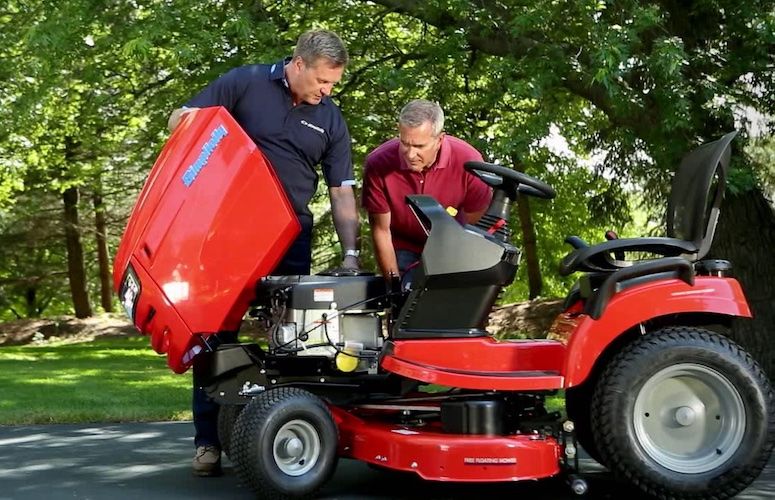
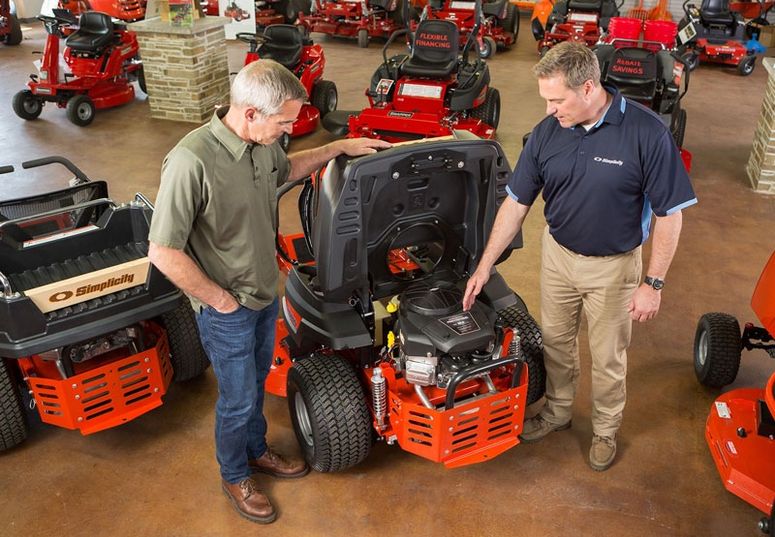
- Lawn Mower Service Tools & Equipment
- Simplicity Lawn Mower Won’t Start Service Table
- How to Inspect the Simplicity Battery
- How to Inspect the Spark Plug if Your Lawn Mower Won’t Start
- How to Examine the Lawn Mower Fuel Filter
- How to Inspect a Lawn Mower Ignition System
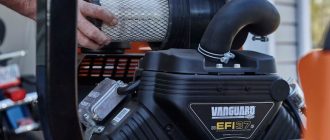
- How to Check the Air Filter
- How to Test a Carburetor
- How to Check the Engine Oil Level
- How to Test the Safety Switch
- Simplicity Lawn Mower Won’t Start FAQ
If your Simplicity lawn mower won’t start, you’ve come to the right place. Troubleshooting the issue requires expertise in diagnosing problems visually and within the engine components. By identifying potential causes such as lack of oil or power issues, you can take the necessary steps to resolve them. Our troubleshooting solutions will guide you through the process of diagnosing the problem and suggesting the required replacements, while also noting details like fuel consumption type.
In this guide, we’ll address common issues that may prevent your Simplicity lawn mower from starting, providing step-by-step instructions to help you identify the cause and recommend the appropriate solutions.
By following these troubleshooting techniques, you’ll be able to get your Simplicity lawn mower back in action, ensuring efficient performance and a well-maintained lawn. Let’s dive into the troubleshooting process and get your lawn mower running smoothly again.
Lawn Mower Service Tools & Equipment
When troubleshooting a riding lawn mower that won’t start, the following tools and equipment may be helpful:
- Socket set: Used for removing and installing various components, such as spark plugs, battery terminals, and engine covers.
- Spark plug wrench: Specifically designed to remove and install spark plugs.
- Multimeter: Used to measure electrical continuity, voltage, and resistance. It can help diagnose electrical issues.
- Fuel pressure gauge: Used to measure the fuel pressure in the fuel system. It can help identify fuel-related problems.
- Battery charger or jumper cables: Used to charge or jump-start the battery if it is weak or dead.
- Screwdrivers: Assorted sizes and types for loosening and tightening screws and fasteners.
- Pliers: Useful for gripping and manipulating various components.
- Wire brush: Used for cleaning battery terminals, spark plugs, and other electrical connections.
- Safety goggles and gloves: Essential for protecting your eyes and hands during maintenance and troubleshooting tasks.
- Shop manual or owner’s manual: Provides specific instructions and information about your particular model of riding lawn mower.
Remember to consult the owner’s manual or manufacturer’s guidelines for your specific model to ensure you have the appropriate tools and equipment for troubleshooting. Additionally, always prioritize safety and take necessary precautions when working on your riding lawn mower.
Simplicity Lawn Mower Won’t Start Service Table
This table is designed to be useful for both beginners and professionals. It provides a simple overview of possible causes and solutions for a Simplicity lawn mower that won’t start. The instructions provided in the table are straightforward and can be followed by beginners with basic knowledge of lawn mower maintenance and troubleshooting.
However, it’s important to note that some troubleshooting tasks, such as inspecting and replacing certain parts, may require more advanced skills or professional assistance. Beginners should always exercise caution and refer to the mower’s manual or seek professional help when needed.
| Possible Causes | Solutions |
|---|---|
| Low or discharged battery | 1. Check battery connections and ensure they are tight and secure. 2. Charge the battery or replace if necessary. |
| Faulty spark plug | 1. Remove the spark plug and inspect for signs of wear or damage. 2. Clean or replace the spark plug as needed. |
| Clogged fuel filter | 1. Locate the fuel filter and inspect for any debris or clogs. 2. Replace the fuel filter if necessary. |
| Empty fuel tank | 1. Check the fuel level in the tank and refill if empty. |
| Stale fuel | 1. Drain the old fuel from the tank and replace it with fresh fuel. |
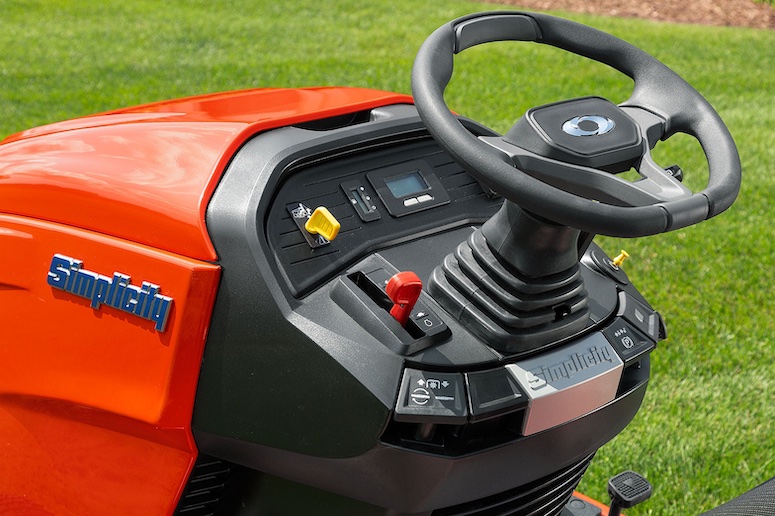
| Faulty ignition switch | 1. Check the ignition switch for proper operation. 2. If faulty, replace the ignition switch. |
| Dirty air filter | 1. Remove the air filter and inspect for dirt or debris. 2. Clean or replace the air filter if needed. |
| Safety switch engaged | 1. Check all safety switches, such as the seat switch or blade engagement switch, and ensure they are properly engaged. |
| Blocked fuel line | 1. Inspect the fuel line for any blockages or restrictions. 2. Clear the blockage or replace the fuel line if necessary. |
| Engine overheating | 1. Check the engine for signs of overheating, such as a hot engine or excessive smoke. 2. Allow the engine to cool down before attempting to start it again. |
Note: This table provides an overview of possible causes and solutions for a Simplicity lawn mower that won’t start. It is recommended to refer to the specific model’s manual or consult a professional for more detailed troubleshooting and repair instructions.
How to Inspect the Simplicity Battery
To check the battery if your Simplicity lawn mower won’t start, follow these step-by-step instructions:
- Safety first: Ensure the lawn mower is turned off and the ignition key is removed to prevent accidental startup.
- Locate the battery: The battery is typically located under the seat or near the engine compartment of the lawn mower.
- Inspect the battery terminals: Check the battery terminals for any signs of corrosion or buildup. Corrosion can hinder the flow of electrical current.
- Clean the terminals: If you notice corrosion, use a wire brush to clean the battery terminals thoroughly. Make sure to brush away any debris or oxidation.
- Disconnect the battery cables: Using a socket or wrench, loosen and remove the negative (black) battery cable first, followed by the positive (red) cable. Start with the negative cable to prevent accidental short-circuiting.
- Check the battery voltage: Set your multimeter to the DC voltage setting. Connect the positive (red) lead of the multimeter to the positive battery terminal and the negative (black) lead to the negative battery terminal.
- Read the voltage: The battery voltage should ideally be around 12.6 volts or higher. If the voltage is significantly lower, it may indicate a weak or discharged battery.
- Charge or replace the battery: If the battery voltage is low, use a battery charger to recharge the battery. Follow the manufacturer’s instructions for proper charging procedures. If the battery fails to hold a charge or is old and worn out, consider replacing it with a new one.
- Reconnect the battery cables: Once the battery is charged or replaced, reconnect the positive (red) battery cable first, followed by the negative (black) cable. Ensure the connections are tight and secure.
- Start the lawn mower: Turn the ignition key to the “start” position and attempt to start the lawn mower. If the battery was the issue, it should now start up. If the problem persists, further troubleshooting may be necessary.
Remember to always refer to the owner’s manual for specific instructions and safety guidelines for your Simplicity lawn mower model.
How to Inspect the Spark Plug if Your Lawn Mower Won’t Start
To inspect the spark plug if your Simplicity lawn mower won’t start, follow these step-by-step instructions:
- Safety first: Ensure the lawn mower is turned off and the ignition key is removed to prevent accidental startup.
- Locate the spark plug: The spark plug is typically located on the engine cylinder head and is connected to a thick wire.
- Remove the spark plug boot: Grasp the spark plug wire boot firmly and twist it counterclockwise to disconnect it from the spark plug. Pull the boot away from the spark plug.
- Clean the area around the spark plug: Use a clean cloth or compressed air to remove any dirt, debris, or grass clippings from around the spark plug. This will prevent contaminants from falling into the cylinder when the spark plug is removed.
- Remove the spark plug: Use a spark plug socket wrench to loosen and remove the spark plug by turning it counterclockwise. Carefully lift the spark plug out of the engine cylinder.
- Inspect the spark plug: Examine the condition of the spark plug. Look for signs of wear, such as fouling, carbon buildup, or electrode damage. A worn or damaged spark plug may prevent the lawn mower from starting.
- Clean or replace the spark plug: If the spark plug appears dirty or fouled, you can clean it using a wire brush or spark plug cleaner. Ensure that the electrode gap is set correctly according to the manufacturer’s specifications. If the spark plug is heavily damaged or worn, it is recommended to replace it with a new one.
- Install the spark plug: Insert the cleaned or new spark plug into the engine cylinder by hand. Use the spark plug socket wrench to tighten it gently in a clockwise direction. Be careful not to overtighten.
- Reconnect the spark plug boot: Slide the spark plug wire boot back onto the spark plug until it is fully seated. You may need to give it a gentle twist to ensure a secure connection.
- Start the lawn mower: Turn the ignition key to the “start” position and attempt to start the lawn mower. If the spark plug was the issue, the mower should now start up. If the problem persists, further troubleshooting may be necessary.
Remember to always refer to the owner’s manual for specific instructions and safety guidelines for your Simplicity lawn mower model.
How to Examine the Lawn Mower Fuel Filter
To examine the fuel filter if your Simplicity lawn mower won’t start, follow these step-by-step instructions:
- Safety first: Ensure the lawn mower is turned off and the ignition key is removed to prevent accidental startup. Allow the engine to cool down before proceeding.
- Locate the fuel filter: The fuel filter is typically located along the fuel line between the fuel tank and the carburetor. It may be a small cylindrical or inline filter.
- Prepare the tools: Gather the necessary tools, including safety goggles, a pair of pliers, a clean rag, and a container to catch any fuel that may spill.
- Shut off the fuel supply: If your lawn mower has a fuel shutoff valve, turn it to the “off” position. If there is no fuel shutoff valve, you can skip this step.
- Position the container: Place the container underneath the fuel filter to catch any fuel that may leak out during the examination.
- Remove the fuel filter: Using a pair of pliers, carefully loosen the hose clamps on both ends of the fuel filter. Slide the clamps away from the filter and then remove the filter from the fuel line. Some fuel may spill, so be prepared to catch it with the container and use the rag to wipe up any spills.
- Inspect the fuel filter: Examine the fuel filter for any signs of clogging, dirt, or debris. A clogged fuel filter can restrict fuel flow and prevent the lawn mower from starting. If the filter appears dirty or obstructed, it may need to be cleaned or replaced.
- Clean or replace the fuel filter: If the fuel filter is dirty or clogged, you can try cleaning it with a suitable solvent or by blowing compressed air through it in the opposite direction of fuel flow. However, it is generally recommended to replace the fuel filter with a new one to ensure proper fuel flow.
- Install the fuel filter: Position the new or cleaned fuel filter back onto the fuel line. Make sure it is securely in place. Slide the hose clamps over the ends of the filter and tighten them with the pliers to create a snug fit.
- Turn on the fuel supply: If your lawn mower has a fuel shutoff valve, turn it to the “on” position. This will allow fuel to flow into the carburetor.
- Start the lawn mower: Turn the ignition key to the “start” position and attempt to start the lawn mower. If the fuel filter was causing the issue, the mower should now start up. If the problem persists, further troubleshooting may be necessary.
Remember to consult your Simplicity lawn mower’s owner’s manual for specific instructions and safety precautions related to your model’s fuel filter and maintenance procedures.
How to Inspect a Lawn Mower Ignition System
To inspect the ignition system if your Simplicity lawn mower won’t start, follow these step-by-step instructions:
- Ensure safety: Before beginning any inspection, make sure the lawn mower is turned off and the ignition key is removed. Allow the engine to cool down if it was recently running.
- Locate the ignition components: The ignition system consists of several components, including the spark plug, ignition coil, spark plug wire, and ignition switch. Familiarize yourself with the location of these parts on your Simplicity lawn mower.
- Inspect the spark plug: Start by examining the spark plug. Remove the spark plug wire by firmly grasping the boot and pulling it away from the spark plug. Use a spark plug socket and a ratchet to carefully remove the spark plug from the engine. Inspect the spark plug for signs of damage, such as fouling, corrosion, or excessive wear. If the spark plug appears dirty or worn out, it may need to be cleaned or replaced.
- Check the spark plug gap: Use a spark plug gap gauge to measure the gap between the electrode and the ground electrode of the spark plug. Refer to your Simplicity lawn mower’s manual for the recommended gap specification. If the gap is too large or too small, it can affect the ignition spark and cause starting issues. Adjust the gap if necessary using a gap tool.
- Inspect the spark plug wire: Examine the spark plug wire for any visible damage, such as cracks, cuts, or signs of wear. Check the connection between the wire and the spark plug boot to ensure it is secure. If the wire appears damaged or the connection is loose, it may need to be replaced.
- Inspect the ignition coil: Locate the ignition coil, which is typically mounted near the flywheel. Check the ignition coil for any signs of damage, such as cracks or burnt spots. Ensure that the connections to the coil are secure and free from corrosion. If the ignition coil is damaged or faulty, it may need to be replaced.
- Check the ignition switch: Test the ignition switch by turning it to the “on” position. Verify that the switch is functioning correctly and making a proper connection. If the switch is loose, damaged, or not engaging properly, it may need to be repaired or replaced.
- Clean or replace components: If any of the ignition system components appear dirty, corroded, or damaged, clean them with a suitable cleaner or replace them as necessary.
- Reassemble and test: Once you have inspected and addressed any issues with the ignition system components, reassemble the spark plug, spark plug wire, and any other parts you removed. Ensure all connections are secure. Turn the ignition key to the “start” position and attempt to start the lawn mower.
If the lawn mower still won’t start after inspecting the ignition system, there may be other underlying issues that require further troubleshooting or professional assistance. Consult your Simplicity lawn mower’s owner’s manual or contact a qualified technician for more advanced diagnostics and repairs.
How to Check the Air Filter
To check the air filter if your Simplicity lawn mower won’t start, follow these step-by-step instructions:
- Ensure safety: Before starting any maintenance tasks, make sure the lawn mower is turned off and the ignition key is removed. Allow the engine to cool down if it was recently running.
- Locate the air filter: The air filter is typically located on the side or top of the engine, covered by a plastic or metal housing. Refer to your Simplicity lawn mower’s manual to identify the exact location of the air filter.
- Remove the air filter cover: Use a screwdriver or socket wrench, depending on the type of fasteners, to remove the screws or bolts securing the air filter cover. Carefully lift off the cover and set it aside.
- Inspect the air filter: Once the cover is removed, you will have access to the air filter. Take a close look at the filter element to assess its condition. Check for any signs of dirt, debris, or damage. A dirty or clogged air filter can restrict airflow and affect the engine’s performance.
- Clean or replace the air filter: If the air filter is visibly dirty or clogged, it should be cleaned or replaced. Cleaning the air filter is suitable if it is a washable and reusable type. If it is a disposable filter or excessively dirty, it is recommended to replace it with a new one.
- Cleaning the air filter: If the air filter is washable, gently tap it on a flat surface or use compressed air to remove loose debris. Then, wash the filter element with warm, soapy water. Rinse it thoroughly and allow it to dry completely before reinstallation.
- Replacing the air filter: If the air filter is disposable or cannot be effectively cleaned, replace it with a new one. Ensure that the replacement filter is compatible with your Simplicity lawn mower model.
- Reinstall the air filter and cover: Once the air filter is clean or replaced, carefully place it back into the air filter housing. Ensure it is properly seated and fits snugly. Then, reattach the air filter cover and secure it with the screws or bolts.
- Test the lawn mower: After reassembling the air filter and cover, turn the ignition key to the “start” position and attempt to start the lawn mower. If the air filter was the cause of the starting issue, cleaning or replacing it should improve the engine’s performance.
Regularly inspect and maintain the air filter according to the manufacturer’s recommendations to ensure optimal engine performance and prevent starting issues. If the lawn mower still won’t start after checking the air filter, there may be other underlying issues that require further troubleshooting or professional assistance. Consult your Simplicity lawn mower’s owner’s manual or contact a qualified technician for advanced diagnostics and repairs.
How to Test a Carburetor
To test the carburetor if your Simplicity lawn mower won’t start, follow these step-by-step instructions:
- Safety first: Before performing any maintenance tasks, make sure the lawn mower is turned off, the ignition key is removed, and the engine has cooled down.
- Locate the carburetor: The carburetor is typically mounted on the side or top of the engine, connected to the air intake system. Refer to your Simplicity lawn mower’s manual to identify the exact location of the carburetor.
- Inspect the carburetor visually: Check the carburetor for any signs of damage, such as cracks, leaks, or loose connections. Look for buildup of dirt, debris, or varnish that may be blocking the carburetor’s passages or jets.
- Check the fuel flow: Disconnect the fuel line from the carburetor and place a container below it to catch any fuel. Turn the fuel valve on or engage the fuel pump (depending on your lawn mower’s setup) and observe if fuel flows freely into the container. If there is no or insufficient fuel flow, check the fuel line, fuel filter, and fuel tank for blockages or restrictions.
- Clean the carburetor: If the carburetor appears dirty or clogged, it may need to be cleaned. Remove the carburetor from the engine according to the manufacturer’s instructions. Disassemble the carburetor, taking note of the location of all components. Use a carburetor cleaner specifically designed for small engines to clean the various parts, including the jets, passages, float bowl, and needle valve. Use a soft brush or small wire to remove any stubborn debris.
- Inspect the carburetor gaskets: Check the condition of the carburetor gaskets. If they are worn, damaged, or deteriorated, they should be replaced to ensure proper sealing and prevent fuel leaks.
- Reassemble the carburetor: After cleaning, reassemble the carburetor by reversing the disassembly process. Make sure all components are properly aligned and seated.
- Reinstall the carburetor: Carefully reinstall the carburetor onto the engine, following the manufacturer’s instructions. Ensure all connections and linkages are properly attached and secured.
- Test the lawn mower: Turn the ignition key to the “start” position and attempt to start the lawn mower. If the carburetor was the cause of the starting issue, cleaning or repairing it should improve fuel flow and engine performance.
If the lawn mower still won’t start or has other issues after testing and cleaning the carburetor, there may be additional underlying problems that require further troubleshooting or professional assistance. Consult your Simplicity lawn mower’s owner’s manual or contact a qualified technician for advanced diagnostics and repairs.
How to Check the Engine Oil Level
To check the engine oil level if your Simplicity lawn mower won’t start, follow these step-by-step instructions:
- Safety precautions: Ensure that the lawn mower is turned off and the engine has cooled down before checking the oil level. This will prevent any accidental injuries.
- Locate the oil dipstick: The oil dipstick is typically located on the side or top of the engine. Refer to your Simplicity lawn mower’s manual to identify the exact location of the dipstick.
- Remove the dipstick: Grasp the dipstick firmly and pull it out of the engine. Wipe off any oil residue from the dipstick using a clean cloth or paper towel.
- Insert the dipstick back in: Carefully insert the dipstick back into the engine, ensuring it goes all the way in and is seated properly.
- Remove the dipstick again: Pull the dipstick out of the engine once more, and this time, observe the oil level.
- Check the oil level: The dipstick will have indicators or markings that show the recommended oil level range. Typically, there will be a “Full” mark and a “Low” mark. The oil level should fall between these two marks. If the oil level is below the “Low” mark, additional oil needs to be added.
- Add oil if necessary: If the oil level is low, use the appropriate type and grade of oil recommended by Simplicity for your lawn mower. Slowly pour a small amount of oil into the oil fill port, and then recheck the oil level using the dipstick. Repeat this process until the oil level reaches the recommended range.
- Reinstall the dipstick: Once the oil level is at the proper range, carefully insert the dipstick back into the engine, ensuring it is fully seated.
Checking the engine oil level is an essential maintenance task, as low oil levels can lead to engine damage and performance issues. If the oil level is sufficient and your Simplicity lawn mower still won’t start, there may be other underlying issues that require further troubleshooting or professional assistance. Consult your lawn mower’s manual or contact a qualified technician for advanced diagnostics and repairs.
How to Test the Safety Switch
To test a safety switch on a Simplicity lawn mower, follow these step-by-step instructions:
- Safety precautions: Before performing any tests, ensure that the lawn mower is turned off and the engine is cool. Disconnect the spark plug wire to prevent accidental starting.
- Identify the safety switches: Simplicity lawn mowers typically have several safety switches, such as the seat switch, brake/clutch switch, and blade engagement switch. Refer to your lawn mower’s manual to identify the specific location of these switches.
- Inspect the switches: Visually inspect each safety switch for any visible signs of damage, such as loose connections, broken wires, or corrosion. Make sure the switches are clean and securely mounted.
- Test the seat switch: Sit on the mower seat and engage the parking brake. Attempt to start the mower while remaining seated. If the mower does not start, the seat switch may be faulty. To test it, disconnect the wire harness from the seat switch and connect the two terminals with a jumper wire. Attempt to start the mower again. If it starts, the seat switch is likely the issue and should be replaced.
- Test the brake/clutch switch: Ensure the parking brake is engaged, and the mower is in neutral. Attempt to start the mower while pressing the brake or clutch pedal. If the mower doesn’t start, the brake/clutch switch may be faulty. Test it by disconnecting the wire harness from the switch and connecting the two terminals with a jumper wire. Try starting the mower again. If it starts, the brake/clutch switch is likely the problem and needs replacement.
- Test the blade engagement switch: Ensure the parking brake is engaged and the mower deck is disengaged. Attempt to start the mower while engaging the blade engagement switch. If the mower doesn’t start, the switch may be faulty. Test it by disconnecting the wire harness and using a multimeter set to continuity mode. Place the meter probes on the switch terminals and activate the switch. If there is no continuity when the switch is engaged, it needs to be replaced.
- Replace faulty switches: If any of the safety switches fail the tests, they should be replaced with genuine Simplicity parts. Consult your lawn mower’s manual or contact a qualified technician for assistance in finding and replacing the specific safety switch.
Regularly testing and maintaining the safety switches on your Simplicity lawn mower is crucial for safe and proper operation. If troubleshooting the safety switches does not resolve the starting issue, there may be other underlying problems that require further inspection or professional assistance.
Simplicity Lawn Mower Won’t Start FAQ
It’s important to refer to your Simplicity lawn mower’s manual for specific instructions and recommended maintenance procedures. If you are unsure or uncomfortable with any troubleshooting steps, it’s always best to seek professional assistance.
Q1: Why won’t my Simplicity lawn mower start?
A: There could be several reasons why your Simplicity lawn mower won’t start, such as a dead battery, clogged fuel filter, faulty spark plug, or issues with the ignition system. Refer to the troubleshooting steps in the service table for a comprehensive list of potential causes and solutions.
Q2: How do I know if my Simplicity lawn mower’s battery is dead?
A: To check the battery, visually inspect it for any signs of damage or corrosion. Use a multimeter to measure the battery voltage. A fully charged battery should read around 12.6 volts. If the voltage is significantly lower, it may indicate a dead or discharged battery that needs to be recharged or replaced.
Q3: What should I do if the spark plug is not firing?
A: Start by removing the spark plug and inspecting it for damage or fouling. Clean or replace the spark plug if necessary. Check the spark plug wire for any loose connections or damage. If the spark plug is still not firing, there may be an issue with the ignition system that requires further inspection.
Q4: How often should I check the air filter on my Simplicity lawn mower?
A: It is recommended to check the air filter before each use or at least once a mowing season. A clogged or dirty air filter can restrict airflow and affect the engine’s performance and starting. Clean or replace the air filter if it appears dirty or damaged.
Q5: Can a clogged fuel filter prevent the lawn mower from starting?
A: Yes, a clogged fuel filter can restrict the fuel flow to the engine, causing starting issues. If you suspect a clogged fuel filter, inspect it for dirt or debris. Clean or replace the fuel filter if necessary.
Q6: Why is the engine oil level important for starting the mower?
A: The engine oil lubricates the internal components of the engine and helps maintain proper engine performance. If the engine oil level is too low, it can cause excessive friction and affect the starting process. Check the oil level regularly and add or replace oil as needed.
Q7: Can a faulty safety switch prevent the lawn mower from starting?
A: Yes, faulty safety switches, such as the seat switch or brake/clutch switch, can prevent the lawn mower from starting. These switches are designed to interrupt the ignition circuit if certain conditions are not met for safety purposes. If the safety switches are not functioning properly, the mower may not start.
Q8: When should I consult a professional for lawn mower starting issues?
A: If you have followed the troubleshooting steps and performed the necessary inspections and tests but still cannot determine the cause of the starting problem, it may be best to consult a qualified technician. They have the expertise and specialized tools to diagnose and repair complex issues with your Simplicity lawn mower.
Note: The troubleshooting steps provided in the service table and instructions are general guidelines. Always refer to your Simplicity lawn mower’s manual or consult a professional for specific recommendations and procedures based on your model and situation.


How do I know if my Simplicity lawn mower’s battery is dead? And what should I do if I have checked all the components mentioned but my Simplicity lawn mower still won’t start?
To check the battery, visually inspect it for any signs of damage or corrosion. Use a multimeter to measure the battery voltage. A fully charged battery should read around 12.6 volts. If the voltage is significantly lower, it may indicate a dead or discharged battery that needs to be recharged or replaced.
If you have gone through the troubleshooting steps and haven’t been able to identify the issue, it may be best to consult a qualified technician or contact Simplicity customer support for further assistance. They will have the expertise to diagnose and address more complex problems with your lawn mower.