- Riding Lawn Mower Service Tools & Equipment
- Service Table for Craftsman Lawn Mower Won’t Start
- How to Check the Lawn Mower Battery
- How to Inspect the Spark Plug
- How to Test the Safety Switch
- How to Test the Air Filter
- How to Examine the Fuel Filter
- How to Inspect the Ignition System
- How to Inspect the Carburetor
- How to Check the Engine Oil Level
- Craftsman Lawn Mower Won’t Start FAQ
Is your Craftsman lawn mower refusing to start? Don’t worry, we’re here to help! Troubleshooting a lawn mower that won’t start can be frustrating, but with the right knowledge and steps, you can quickly diagnose and resolve the issue. Whether it’s a problem with the engine, fuel system, or electrical components, understanding the common causes and solutions will enable you to get your Craftsman lawn mower up and running again in no time.
In this guide, we’ll provide you with expert troubleshooting solutions to diagnose and fix problems preventing your Craftsman lawn mower from starting. We’ll explore both visual and internal inspections to identify issues such as fuel problems, engine malfunctions, electrical faults, and more. Additionally, we’ll suggest appropriate replacements and provide tips for recording important details like fuel consumption type and damaged components. By following these step-by-step instructions, you’ll be well-equipped to troubleshoot and resolve issues with your Craftsman lawn mower, ensuring a smooth and reliable mowing experience.
Please note that while this guide aims to provide comprehensive troubleshooting solutions, it’s essential to exercise caution and adhere to safety precautions when working on your lawn mower. If you’re unsure about any aspect of the troubleshooting process or lack the necessary experience, it’s always wise to consult a professional or reach out to Craftsman customer support for further assistance. Let’s dive in and get your Craftsman lawn mower back in action!
Riding Lawn Mower Service Tools & Equipment
When troubleshooting a riding lawn mower that won’t start, you may need the following tools and equipment:
- Socket set: Used for removing and installing bolts and nuts.
- Screwdrivers: Both flathead and Phillips head screwdrivers for various tasks.
- Spark plug wrench: Specifically designed to remove and install spark plugs.
- Multimeter: Used to measure electrical current, voltage, and resistance.
- Fuel pressure gauge: Helps to diagnose fuel-related issues.
- Compression tester: Used to check engine compression.
- Battery charger: For charging or testing the battery.
- Fuel container: Used for fuel testing and refueling if necessary.
- Air compressor: Helps clean debris from the engine and other components.
- Safety goggles and gloves: Protect your eyes and hands while working.
- Cleaning brushes: Used to clean spark plugs, carburetors, and other components.
- Fuel line clamps: Used to clamp fuel lines to prevent fuel leakage during maintenance.
- Wire brush: Used to clean terminals, connectors, and other electrical components.
- Oil dipstick: Used to check the engine oil level.
Additionally, it’s always a good idea to have the specific user manual or technical documentation for your riding lawn mower model. This will provide detailed information and instructions specific to your machine.
Remember to exercise caution and follow safety guidelines while troubleshooting and working on your riding lawn mower. If you’re unsure about any aspect of the troubleshooting process or lack experience, it’s recommended to consult a professional or contact the manufacturer’s customer support for assistance.
Service Table for Craftsman Lawn Mower Won’t Start
Below is a service table to help you troubleshoot your Craftsman lawn mower that won’t start. It provides a list of common issues, possible causes, and suggested solutions:
| Issue | Possible Causes | Solutions |
|---|---|---|
| Battery | Dead battery or loose/damaged connections | – Check battery charge |
| – Tighten or replace battery connections | ||
| Fuel System | Empty fuel tank or clogged fuel filter | – Check fuel level and refill if needed |
| – Clean or replace the fuel filter | ||
| Spark Plug | Fouled or worn spark plug | – Remove and inspect spark plug for damage or fouling |
| – Clean or replace the spark plug as necessary | ||
| Ignition System | Faulty ignition switch or damaged wiring | – Check ignition switch for proper functioning |
| – Inspect wiring for any signs of damage or loose connections | ||
| Safety Switches | Malfunctioning safety switches | – Verify proper functioning of all safety switches |
| – Clean or replace safety switches as needed | ||
| Carburetor | Clogged carburetor or improper fuel mixture | – Clean or rebuild the carburetor |
| – Adjust the fuel mixture to the proper ratio | ||
| Engine Oil | Low or dirty engine oil | – Check engine oil level and top up if necessary |
| – Change the engine oil if it’s dirty or contaminated |
Remember to refer to your Craftsman lawn mower’s user manual for specific instructions and safety guidelines.
If you’re unsure about any troubleshooting steps or lack experience, it’s recommended to consult a professional or contact Craftsman customer support for assistance.
How to Check the Lawn Mower Battery
To check the battery if your Craftsman lawn mower won’t start, follow these step-by-step instructions:
- Safety first: Ensure the lawn mower is turned off and the spark plug wire is disconnected to prevent accidental starting.
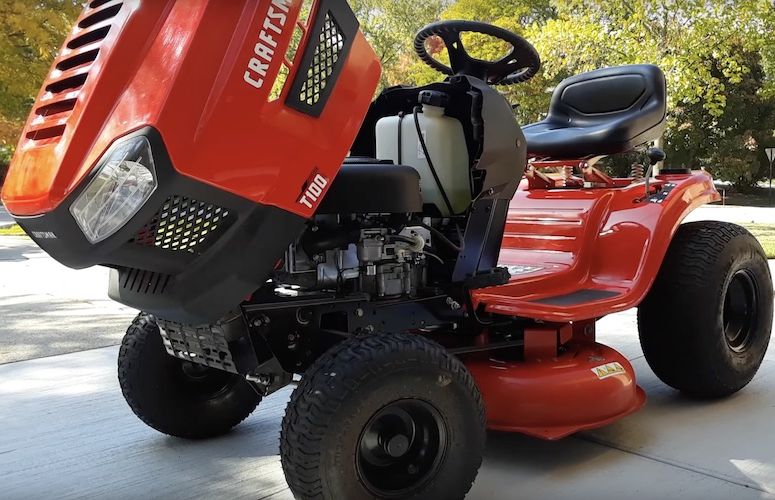
- Locate the battery: The battery is typically located under the hood or seat of the lawn mower. Refer to your owner’s manual for the exact location.
- Inspect the battery: Check for any signs of physical damage such as cracks, leaks, or corrosion on the battery terminals.
- Check battery connections: Ensure that the battery cables are securely attached to the battery terminals. Tighten any loose connections if necessary.
- Clean the battery terminals: If there is corrosion on the battery terminals, use a wire brush to gently clean the terminals. Make sure to remove any dirt, rust, or debris that may be hindering a proper connection.
- Test the battery voltage: Use a multimeter set to DC voltage and connect the positive (red) probe to the positive terminal of the battery and the negative (black) probe to the negative terminal. Check the voltage reading. A fully charged battery should read around 12.6 to 12.8 volts. If the voltage is significantly lower, the battery may need to be recharged or replaced.
- Recharge or replace the battery: If the battery voltage is low, you can try recharging it using an appropriate battery charger. Follow the charger manufacturer’s instructions for charging. If the battery does not hold a charge or fails the voltage test, it may need to be replaced with a new one.
- Reconnect the battery: Once you have finished checking the battery, reconnect the battery cables to the appropriate terminals, ensuring a secure connection.
- Reinstall any battery covers or housings that were removed during the inspection.
- Test the lawn mower: Reconnect the spark plug wire and attempt to start the lawn mower. If the battery was the cause of the starting issue, it should now start up properly.
If the lawn mower still won’t start after checking the battery, you may need to further troubleshoot other potential issues such as the spark plug, fuel system, or ignition system. Refer to the user manual or seek professional assistance for further troubleshooting steps.
How to Inspect the Spark Plug
To inspect the spark plug if your Craftsman lawn mower won’t start, follow these step-by-step instructions:
- Safety first: Ensure the lawn mower is turned off and the spark plug wire is disconnected to prevent accidental starting.
- Locate the spark plug: The spark plug is typically located on the side or top of the engine cylinder. Refer to your owner’s manual for the exact location.
- Remove the spark plug: Use a spark plug socket and ratchet or a spark plug wrench to loosen and remove the spark plug from the engine cylinder. Turn it counterclockwise to unscrew it.
- Inspect the spark plug condition: Examine the spark plug for any signs of wear, damage, or fouling. Look for:
- Excessive carbon deposits: If the spark plug is covered in black, oily, or carbon deposits, it may indicate a rich fuel mixture or an oil consumption problem.
- Burned or eroded electrodes: Check if the center electrode or ground electrode is worn down, eroded, or melted. This can affect the spark plug’s performance.
- Damaged insulator: Look for any cracks, chips, or physical damage to the ceramic insulator around the center electrode. A damaged insulator can lead to misfiring.
- Check the spark plug gap: Using a spark plug gap tool or a feeler gauge, measure the gap between the center electrode and the ground electrode. Refer to your owner’s manual for the correct gap specification. If the gap is too wide or too narrow, it may affect the spark plug’s ability to ignite the fuel-air mixture.
- Clean or replace the spark plug: If the spark plug appears dirty, fouled, or damaged, it may need to be cleaned or replaced. Cleaning can be done by using a wire brush or spark plug cleaner to remove carbon deposits. However, if the spark plug is heavily worn, damaged, or has a significant gap, it is best to replace it with a new one.
- Install the spark plug: Carefully thread the spark plug into the engine cylinder by hand. Use the spark plug socket and ratchet or spark plug wrench to tighten it snugly, but avoid overtightening.
- Reconnect the spark plug wire: Ensure the spark plug wire is securely connected to the spark plug terminal.
- Test the lawn mower: Reconnect any safety switches and attempt to start the lawn mower. If the spark plug was the cause of the starting issue, the lawn mower should now start up properly.
If the lawn mower still won’t start after inspecting and cleaning/replacing the spark plug, there may be other issues with the fuel system, ignition system, or other components.
Refer to the user manual or seek professional assistance for further troubleshooting steps.
How to Test the Safety Switch
To test a Craftsman lawn mower safety switch, follow these step-by-step instructions:
- Ensure safety: Before beginning any testing, make sure the lawn mower is turned off and the spark plug wire is disconnected to prevent accidental starting.
- Locate the safety switch: The safety switch is typically located on the control panel, near the handle or seat, depending on the model. Refer to your owner’s manual for the exact location and type of safety switch used.
- Identify the different safety switches: Craftsman lawn mowers may have multiple safety switches, such as the seat switch, blade engagement switch, or parking brake switch. Identify the specific switch you want to test.
- Inspect the switch: Visually examine the safety switch for any signs of damage or wear, such as broken wires, loose connections, or corrosion. Ensure that all the wiring connections to the switch are secure.
- Test the seat switch: If your lawn mower has a seat switch, sit on the seat and attempt to start the mower. If the mower doesn’t start, try wiggling or moving slightly on the seat while turning the ignition key. If the mower starts when you adjust your position, it may indicate a faulty seat switch.
- Test the blade engagement switch: If your lawn mower has a blade engagement switch, ensure the blades are disengaged. Attempt to start the mower while holding down the blade engagement switch. If the mower starts, it suggests that the switch is working correctly. Release the switch to stop the blades.
- Test the parking brake switch: If your lawn mower has a parking brake switch, ensure the parking brake is engaged. Attempt to start the mower while holding down the parking brake switch. If the mower starts, it indicates that the switch is functioning properly. Release the switch and disengage the parking brake.
- Use a multimeter (optional): For a more precise test, you can use a multimeter to check the continuity of the safety switch. Set the multimeter to the continuity or resistance mode. Disconnect the wiring harness from the safety switch and touch the multimeter leads to the switch terminals. If there is continuity or a low resistance reading, the switch is working. If there is no continuity or a high resistance reading, the switch may be faulty.
- Replace or repair the faulty switch: If any of the safety switches fail the tests or show signs of damage, they may need to be replaced. Consult your owner’s manual or contact a professional for the correct replacement part and installation instructions. Ensure that any wiring connections are properly secured during the replacement process.
Testing the safety switch is crucial to ensure the proper functioning and safety of your Craftsman lawn mower. If you are unsure about performing the test or need further assistance, it is recommended to consult the user manual or contact a qualified technician for help.
How to Test the Air Filter
To check the air filter if your Craftsman lawn mower won’t start, follow these step-by-step instructions:
- Preparation: Make sure the lawn mower is turned off and the spark plug wire is disconnected to prevent accidental starting.
- Locate the air filter: The air filter is usually located on the side or top of the engine. It is typically housed within a rectangular or cylindrical plastic or metal cover.
- Remove the air filter cover: Depending on the model, the cover may be secured by screws, clips, or a latch. Use the appropriate tools to loosen and remove the cover.
- Inspect the air filter: Take out the air filter from its housing and visually inspect it for any signs of dirt, debris, or damage. A clogged or dirty air filter can restrict airflow to the engine, causing starting issues.
- Clean the air filter: If the air filter is dirty but still in good condition, you can clean it. Use compressed air or tap it gently against a hard surface to dislodge loose dirt and debris. Be careful not to damage the filter.
- Replace the air filter: If the air filter is excessively dirty, damaged, or cannot be cleaned effectively, it is recommended to replace it. Refer to your owner’s manual for the correct replacement filter part number and instructions.
- Reinstall the air filter: Once the air filter is cleaned or replaced, carefully place it back into the housing. Ensure that it fits securely and properly aligns with the filter housing.
- Replace the air filter cover: Align the cover with the filter housing and secure it using the screws, clips, or latch that was removed earlier. Make sure the cover is tightly fastened to prevent debris from entering the engine.
- Reconnect the spark plug wire: Before attempting to start the lawn mower, reconnect the spark plug wire to the spark plug.
- Start the lawn mower: Turn on the ignition switch or key and attempt to start the lawn mower. With a clean or new air filter, the engine should be able to receive sufficient airflow for proper combustion and startup.
Regularly inspecting and cleaning or replacing the air filter is essential for the optimal performance of your Craftsman lawn mower.
If the lawn mower still doesn’t start after checking and cleaning the air filter, there may be other issues that require further troubleshooting or professional assistance.
How to Examine the Fuel Filter
To examine the fuel filter if your Craftsman lawn mower won’t start, follow these step-by-step instructions:
- Preparation: Ensure that the lawn mower is turned off and the spark plug wire is disconnected to prevent accidental starting.
- Locate the fuel filter: The fuel filter is typically located along the fuel line, either near the fuel tank or the carburetor. It is a small cylindrical or square-shaped component with an inlet and outlet.
- Determine the type of fuel filter: Craftsman lawn mowers may have either an inline fuel filter or a fuel filter inside the fuel tank. Depending on the model, the inspection process may vary slightly.
- Inline fuel filter: If your lawn mower has an inline fuel filter, follow these steps:
- Use pliers or a wrench to clamp the fuel line on both sides of the fuel filter to prevent fuel leakage.
- Carefully loosen the clamps or fittings on both ends of the fuel filter to disconnect it from the fuel line.
- Gently remove the fuel filter from the fuel line.
- Fuel tank fuel filter: If your lawn mower has a fuel filter inside the fuel tank, follow these steps:
- Locate the fuel tank on your lawn mower. It is usually located near the engine.
- Remove the fuel tank cap or fuel tank cover to access the inside of the tank.
- Look for a cylindrical filter attached to the fuel line inside the tank.
- Inspect the fuel filter: Once you have accessed the fuel filter, visually inspect it for any signs of dirt, debris, or clogging. A clogged fuel filter can restrict the flow of fuel to the engine, causing starting issues.
- Clean or replace the fuel filter: If the fuel filter is dirty or clogged, you have two options:
- Cleaning: If the fuel filter is of the washable type, clean it using a suitable solvent or by rinsing it with clean gasoline. Ensure that it is completely dry before reinstalling.
- Replacement: If the fuel filter is non-reusable, damaged, or excessively dirty, it is recommended to replace it with a new one. Refer to your owner’s manual for the correct replacement filter part number.
- Reinstall the fuel filter: If you cleaned the fuel filter, ensure that it is completely dry before reinstalling it. If you replaced the fuel filter, insert the new filter into the fuel line or attach it inside the fuel tank, depending on the type of filter.
- Reconnect the fuel line: If you removed an inline fuel filter, reconnect both ends of the fuel line to the filter and secure them using clamps or fittings. Ensure that the connections are tight and leak-free.
- Reconnect the spark plug wire: Before attempting to start the lawn mower, reconnect the spark plug wire to the spark plug.
- Start the lawn mower: Turn on the ignition switch or key and attempt to start the lawn mower. With a clean or new fuel filter, the engine should receive an uninterrupted flow of fuel, improving the chances of starting successfully.
Regularly inspecting and maintaining the fuel filter is crucial for the proper functioning of your Craftsman lawn mower. If the lawn mower still doesn’t start after examining and cleaning or replacing the fuel filter, there may be other underlying issues that require further troubleshooting or professional assistance.
How to Inspect the Ignition System
To inspect the ignition system if your Craftsman lawn mower won’t start, follow these step-by-step instructions:
- Preparation: Ensure that the lawn mower is turned off and the spark plug wire is disconnected to prevent accidental starting.
- Locate the ignition system components: The ignition system includes several components that work together to generate the spark needed for engine ignition. These components may include the ignition coil, spark plug, ignition switch, and associated wiring.
- Visually inspect the ignition coil: The ignition coil is usually located near the flywheel or engine block. Check for any visible signs of damage, such as cracks, corrosion, or loose connections. Ensure that the ignition coil is securely mounted and that the wiring connections are intact.
- Inspect the spark plug: Locate the spark plug, which is typically situated on the cylinder head. Remove the spark plug using a spark plug socket or wrench. Inspect the spark plug for signs of wear, such as fouling, carbon deposits, or damaged electrodes. If the spark plug is dirty or damaged, it may need to be cleaned or replaced.
- Check the spark plug gap: Using a spark plug gap tool, measure the gap between the center electrode and the ground electrode of the spark plug. Refer to the owner’s manual or spark plug specifications for the correct gap measurement. Adjust the gap as needed using the gap tool.
- Inspect the ignition switch: Examine the ignition switch for any visible damage or loose connections. Ensure that the switch is functioning properly and making a solid electrical connection when in the “ON” position.
- Check the wiring connections: Inspect the wiring connections related to the ignition system, including those connecting the ignition coil, spark plug, and ignition switch. Look for loose or damaged wires, disconnected or corroded terminals, or any signs of electrical faults. Ensure that all connections are secure and in good condition.
- Clean or replace components if necessary: If you find any damaged or worn-out components during the inspection, such as a faulty ignition coil or spark plug, clean or replace them accordingly. Cleaning the spark plug involves removing carbon deposits or fouling using a wire brush or spark plug cleaner. If replacement is necessary, ensure you use the correct part for your lawn mower model.
- Reassemble and reconnect: After inspecting and cleaning or replacing the necessary components, reassemble the ignition system by reconnecting the wiring connections, reinstalling the spark plug (properly torqued), and ensuring the ignition switch is in the correct position.
- Reconnect the spark plug wire: Before attempting to start the lawn mower, reconnect the spark plug wire to the spark plug.
- Start the lawn mower: Turn on the ignition switch or key, and attempt to start the lawn mower. With a properly functioning ignition system, the spark plug should generate a spark to ignite the fuel mixture, allowing the engine to start.
If the lawn mower still doesn’t start after inspecting and addressing potential issues with the ignition system, there may be other underlying problems that require further troubleshooting or professional assistance.
How to Inspect the Carburetor
To test the carburetor if your Craftsman lawn mower won’t start, follow these step-by-step instructions:
- Preparation: Ensure that the lawn mower is turned off and the spark plug wire is disconnected to prevent accidental starting.
- Locate the carburetor: The carburetor is typically mounted on the side or top of the engine, and it is connected to the air filter and fuel line.
- Inspect the carburetor externally: Visually check the carburetor for any visible signs of damage or clogging. Look for cracks, loose fittings, or accumulated debris that may be obstructing the fuel or air passages.
- Check the fuel supply: Ensure that there is fuel in the tank and that the fuel shutoff valve, if equipped, is in the correct position to allow fuel flow to the carburetor.
- Remove the air filter: Disconnect the air filter housing or cover and remove the air filter element. This step allows for better access to the carburetor.
- Inspect the throttle linkage: Examine the throttle linkage to ensure it moves freely and smoothly. Look for any signs of damage, such as broken or disconnected linkage.
- Check the choke operation: Verify that the choke is functioning correctly. If equipped with an automatic choke, make sure it is engaging when the engine is cold. For manual chokes, ensure they are adjusted properly.
- Inspect the fuel bowl: If your carburetor has a removable fuel bowl, carefully remove it, taking note of any gaskets or seals that may be present. Inspect the bowl for signs of contamination, such as dirt, water, or debris. Clean the bowl if necessary.
- Check the fuel passages: Using a carburetor cleaner or compressed air, carefully clean the fuel passages within the carburetor. Pay close attention to the main jet, idle jet, and any other small orifices that may be present. Ensure that these passages are clear and free of any obstructions.
- Reassemble the carburetor: Reinstall the fuel bowl (if applicable), ensuring that any gaskets or seals are properly seated. Reattach the air filter element and secure the air filter housing or cover.
- Reconnect the spark plug wire: Before attempting to start the lawn mower, reconnect the spark plug wire to the spark plug.
- Start the lawn mower: Turn on the ignition switch or key, and attempt to start the lawn mower. Observe whether the engine starts and runs smoothly. If the engine starts and runs properly, it indicates that the carburetor was likely the cause of the starting issue.
If the lawn mower still doesn’t start or runs poorly after testing the carburetor, there may be other underlying problems that require further troubleshooting or professional assistance.
How to Check the Engine Oil Level
To check the engine oil level if your Craftsman lawn mower won’t start, follow these step-by-step instructions:
- Preparation: Ensure that the lawn mower is turned off and the spark plug wire is disconnected to prevent accidental starting.
- Locate the oil dipstick: The oil dipstick is typically located on the side or top of the engine. It may have a yellow or black handle for easy identification.
- Remove the dipstick: Grasp the handle of the dipstick and pull it straight out from the engine. Wipe off any oil on the dipstick with a clean rag or paper towel.
- Insert the dipstick: Insert the clean dipstick back into the dipstick tube until it is fully seated.
- Remove the dipstick again: Pull the dipstick out of the engine and observe the oil level. The dipstick will have markings indicating the minimum and maximum oil levels. Ensure that the oil level is within the recommended range.
- Check the oil condition: Take note of the oil’s color and consistency. The oil should appear clean and have a smooth consistency. If the oil is dark, dirty, or contains debris, it may be time for an oil change.
- Add oil if necessary: If the oil level is below the recommended range, add oil slowly in small increments. Reinsert the dipstick each time and check the oil level until it reaches the proper range. Be careful not to overfill the engine with oil.
- Reinsert the dipstick: Once the oil level is at the correct range, fully insert the dipstick back into the dipstick tube.
- Reconnect the spark plug wire: Before attempting to start the lawn mower, reconnect the spark plug wire to the spark plug.
Checking the engine oil level is an essential step in lawn mower maintenance.
It ensures proper lubrication and helps prevent engine damage. If the oil level is low or the oil appears dirty, it is recommended to change the oil following the manufacturer’s instructions.
Craftsman Lawn Mower Won’t Start FAQ
Q1: Why won’t my Craftsman lawn mower start?
A: There could be several reasons why your Craftsman lawn mower won’t start, including issues with the fuel system, ignition system, battery, spark plug, or safety switches.
Q2: How can I determine if the problem is with the battery?
A: To check the battery, you can use a multimeter to measure its voltage. If the battery voltage is low or below the recommended range, it may need to be recharged or replaced.
Q3: What should I do if my Craftsman lawn mower has a dead battery?
A: If the battery in your Craftsman lawn mower is dead, you can try jump-starting it using a battery charger or a set of jumper cables connected to a working battery. If the battery is old or no longer holds a charge, it may need to be replaced.
Q4: What should I do if the spark plug is faulty?
A: If the spark plug is dirty, worn out, or damaged, it can prevent the lawn mower from starting. You can clean the spark plug or replace it with a new one following the manufacturer’s recommendations.
Q5: How often should I change the spark plug in my Craftsman lawn mower?
A: The spark plug in your Craftsman lawn mower should be replaced at least once a year or after every 100 hours of use. A worn or dirty spark plug can cause starting issues and poor engine performance.
Q6: Are there any safety switches that could be causing the issue?
A: Yes, safety switches are designed to prevent the lawn mower from starting in certain conditions. Check the position and functionality of the seat switch, blade engagement switch, and other safety switches to ensure they are properly engaged and functioning.
Q7: How do I know if the safety switches on my Craftsman lawn mower are working properly?
A: To test the safety switches on your Craftsman lawn mower, follow the manufacturer’s instructions. Typically, you can check if the seat switch, blade engagement switch, and other safety switches are functioning by observing the behavior when trying to start the mower with various conditions (e.g., seat occupied, blades engaged, etc.).
Q8: How often should I check the air filter?
A: It is recommended to check the air filter regularly, especially before the start of the mowing season. A clogged or dirty air filter can restrict airflow and affect the engine’s performance.
Q9: Can a dirty fuel filter cause starting issues?
A: Yes, a clogged or dirty fuel filter can restrict the flow of fuel to the engine, leading to starting problems. Inspect the fuel filter and replace it if necessary.
Q10: Can a clogged fuel filter prevent my Craftsman lawn mower from starting?
A: Yes, a clogged fuel filter can restrict the fuel flow to the engine and cause starting issues. It is recommended to inspect and clean or replace the fuel filter regularly as part of lawn mower maintenance.
Q11: Is it necessary to inspect the ignition system?
A: Yes, a faulty ignition system can prevent the lawn mower from starting. Check the ignition coil, spark plug wire, and other ignition components for any signs of damage or malfunction.
Q12: How can I test the carburetor?
A: You can perform a carburetor test by inspecting the fuel supply, adjusting the carburetor settings, and ensuring proper fuel mixture. If the carburetor is severely damaged, it may need to be cleaned or replaced.
Q13: Should I check the engine oil level before attempting to start the mower?
A: Yes, it is essential to check the engine oil level to ensure proper lubrication. Low oil levels can cause engine damage. Follow the manufacturer’s instructions to check and maintain the engine oil level.
Q14: Why is the engine oil level important for starting my Craftsman lawn mower?
A: The engine oil lubricates the internal components of the engine and ensures smooth operation. If the oil level is too low or dirty, it can lead to engine damage and difficulty in starting the lawn mower.
Q15: What should I do if none of the troubleshooting steps work?
A: If you have followed all the troubleshooting steps and your Craftsman lawn mower still won’t start, it may be necessary to consult a professional technician or contact the manufacturer’s customer support for further assistance.


Why does my Craftsman Lawn Mower start, run for a few minutes then stop, only to start again ten minutes later?
Based on my experience as a mechanic, the issue you’re describing is typically caused by a blockage in the fuel line between the tank and the carburetor. However, it’s also possible that the ignition module is failing, especially if it’s temperature-sensitive. In any case, it seems likely that the fuel delivery system is the root cause. It’s possible that gasoline is leaving the carburetor faster than it’s flowing in, causing the carb to run dry and the engine to stall. To resolve this issue, I would recommend checking for any blockage at the tank screen, as this is often overlooked. Additionally, it’s important to ensure that the valve is operating fully. If you have an in-line filter, it would be wise to replace it. If none of these solutions solve the problem, it’s worth inspecting the fuel path leading into the carburetor. It’s possible that the barb is blocked, or that the float valve port is occluded. If necessary, replacing the fuel line(s) may be necessary. Keep in mind that there are numerous potential points of blockage in the system, so it’s important to thoroughly inspect each component.
How can I test the battery on my Craftsman lawn mower?
To test your Craftsman lawn mower battery, use a multimeter to check its voltage. A fully charged battery should read around 12.6 volts. If the voltage is significantly lower, the battery may be discharged and need recharging or replacement.