- Service Table for Troubleshooting a Troy Bilt Lawn Mower
- Riding Lawn Mower Service Tools & Equipment
- How to Check the Battery
- Check the Air Filter
- How to Examine a Troy Bilt Fuel Filter
- How to Inspect a Lawn Mower Spark Plug
- How to Inspect a Lawn Mower Ignition System
- How to Test the Carburetor & Reinstall the Carburetor Bowl
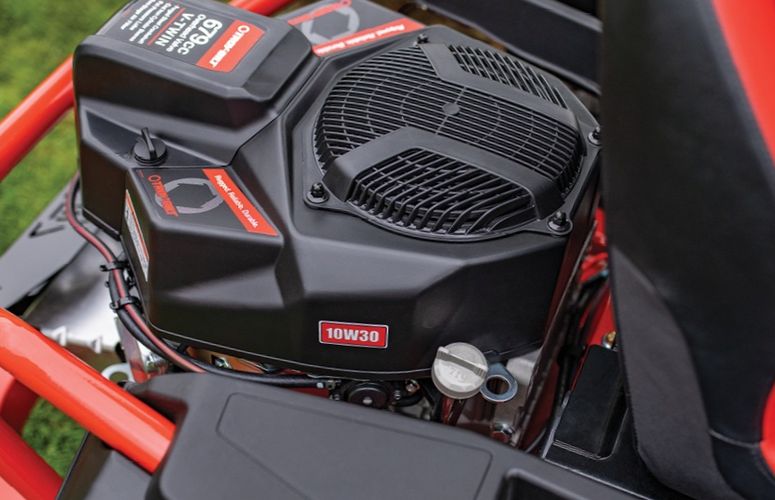
- How to Check the Engine Oil Level
- How to Test a Riding Lawn Mower Safety Switch
- Troy Bilt Lawn Mower Won’t Start FAQ
Is your Troy Bilt Lawn Mower Won’t Start? Don’t worry, we’re here to help you troubleshoot the issue. A riding lawn mower that won’t start can be frustrating, but with some expertise and troubleshooting solutions, we can diagnose the problem and get your mower back up and running in no time. So let’s dive in and discover the solutions to get your Troy-Bilt lawn mower running smoothly again.
Here are some steps to diagnose and potentially resolve the problem:
- Safety first: Ensure the lawn mower is on a flat and stable surface, the spark plug wire is disconnected, and the engine is cool before starting any troubleshooting.
- Check the fuel level: Make sure there is enough fuel in the tank. If it’s low, refill it with fresh gasoline and ensure the fuel shutoff valve (if present) is turned on.
- Inspect the spark plug: Remove the spark plug wire and carefully remove the spark plug using a spark plug wrench. Check for any signs of damage, such as fouling or wear. If the spark plug is dirty or worn out, replace it with a new one of the correct type and gap it according to the manufacturer’s specifications.
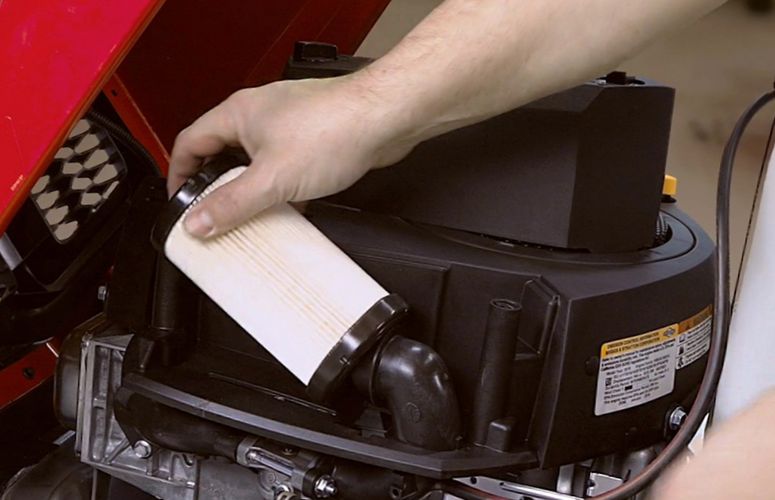
- Verify the air filter: Locate the air filter housing and remove the air filter cover. Inspect the air filter for dirt, debris, or clogs. If the air filter is dirty, clean or replace it with a new one.
- Check the oil level: Locate the oil dipstick on the engine and remove it. Wipe it clean and reinsert it into the dipstick tube without screwing it in. Remove it again and check the oil level. If it’s low, add the recommended oil type in small increments until it reaches the proper level.
- Inspect the fuel line and filter: Trace the fuel line from the fuel tank to the carburetor. Check for any kinks, leaks, or blockages. If necessary, replace the fuel line and ensure the fuel filter is clean or replace it.
- Examine the carburetor: Remove the air filter cover and inspect the carburetor for any visible signs of damage, clogs, or varnish buildup. Clean the carburetor using carburetor cleaner, following the product instructions. If cleaning doesn’t resolve the issue, you may need to consult a professional or replace the carburetor.
- Check the safety features: Ensure all safety switches, such as the blade engagement switch and seat switch, are functioning properly. Test them by engaging and disengaging the blades while seated on the mower. If a safety switch is faulty, it may prevent the engine from starting.
- Verify the battery (if applicable): If your Troy Bilt lawn mower has an electric start feature, check the battery’s charge using a multimeter. If the battery is weak or discharged, recharge or replace it accordingly.
- Seek professional assistance if needed: If you have followed these troubleshooting steps and your Troy Bilt lawn mower still won’t start, it’s recommended to consult a professional technician or authorized service center for further diagnosis and repair.
Remember to consult your lawn mower’s user manual for specific instructions and refer to the manufacturer’s recommendations for maintenance and replacement parts. If the issue persists or if you are unsure about any steps, it is recommended to consult a qualified technician or contact Troy-Bilt customer support for further assistance.
Service Table for Troubleshooting a Troy Bilt Lawn Mower
Here’s a service table for troubleshooting a Troy Bilt lawn mower that won’t start:
| Issue | Possible Causes | Solutions/Replacements |
|---|---|---|
| No power to the mower | Dead battery | Check battery charge and connections |
| Faulty ignition switch | Replace ignition switch if necessary | |
| Blown fuse or tripped breaker | Check and replace fuses/breakers if needed | |
| Engine cranks but won’t start | Lack of fuel | Check fuel tank and refill if necessary |
| Clogged fuel filter | Replace the fuel filter | |
| Dirty spark plug | Clean or replace the spark plug | |
| Faulty ignition coil | Replace the ignition coil if necessary | |
| Improper choke or throttle | Adjust choke and throttle settings | |
| Engine starts but stalls | Dirty air filter | Clean or replace the air filter |
| Water or contaminants in fuel | Drain fuel tank and refill with fresh fuel | |
| Carburetor issues | Clean or rebuild the carburetor | |
| Faulty safety switches | Check and replace faulty safety switches | |
| Electrical issues | Loose or corroded connections | Check and tighten electrical connections |
| Damaged wiring or harness | Repair or replace damaged wiring or harness | |
| Faulty battery or charger | Test and replace the battery or charger |
Please note that this table provides a general overview of possible causes and solutions. It’s important to consult your Troy Bilt lawn mower’s user manual or seek professional assistance for specific troubleshooting steps and replacements.
Riding Lawn Mower Service Tools & Equipment
To troubleshoot a riding lawn mower that won’t start, you may need the following tools and equipment:
- Socket set: A socket set with various sizes of sockets and a ratchet will be useful for removing and installing bolts and fasteners.
- Screwdrivers: Both flathead and Phillips screwdrivers may be needed to remove screws and access various components of the mower.
- Multimeter: A multimeter is a versatile tool that can measure voltage, resistance, and continuity. It is helpful for testing electrical components and circuits.
- Spark plug wrench: A spark plug wrench is a specialized tool designed to remove and install spark plugs. It may be necessary for inspecting or replacing the spark plug.
- Pliers: Pliers, such as needle-nose pliers and slip-joint pliers, can be handy for gripping and manipulating wires and small components.
- Wire brush: A wire brush can be used to clean corrosion or debris from electrical connections and terminals.
- Fuel pressure gauge: If you suspect a fuel-related issue, a fuel pressure gauge can help you test the fuel system’s pressure and diagnose any problems.
- Safety equipment: It’s important to prioritize safety, so ensure you have safety goggles, gloves, and appropriate clothing when working on the mower. Additionally, having a fire extinguisher nearby is a good precautionary measure.
- Manufacturer’s manual: Always refer to the manufacturer’s manual specific to your riding lawn mower model. It contains valuable information, troubleshooting guides, and specifications that will assist you in diagnosing and fixing the problem.
Please note that the tools required may vary depending on the specific issue you are troubleshooting and the make and model of your riding lawn mower. Always consult the manufacturer’s documentation and follow proper safety procedures when working on any equipment.
How to Check the Battery
Here is a step-by-step instruction on how to check the battery if your Troy Bilt lawn mower won’t start:
- Safety first: Ensure that the lawn mower is turned off and the spark plug wire is disconnected to prevent any accidental starting.
- Locate the battery: Depending on the model of your Troy Bilt lawn mower, the battery is typically located under the seat or hood. Refer to your mower’s user manual for the exact location.
- Inspect the battery connections: Check the battery terminals for any signs of corrosion, such as a white or greenish buildup. If corrosion is present, use a wire brush or battery terminal cleaner to clean the terminals.
- Check the battery cables: Ensure that the battery cables are securely connected to the battery terminals. Make sure they are tight and free from any damage or fraying.
- Test the battery voltage: Use a multimeter or voltmeter to measure the battery voltage. Set the meter to DC voltage and touch the positive (red) probe to the positive terminal of the battery and the negative (black) probe to the negative terminal. A fully charged battery should read around 12.6 to 12.8 volts.
- Charge the battery: If the battery voltage is below the recommended range, it may need to be recharged. Connect the battery to a suitable charger and follow the manufacturer’s instructions for charging. Allow sufficient time for the battery to reach a full charge.
- Reinstall the battery: Once the battery is fully charged, reconnect the battery cables to the appropriate terminals. Ensure they are tightened securely but be careful not to over-tighten and damage the terminals.
- Test the mower: Reconnect the spark plug wire and attempt to start the lawn mower. If the battery was the cause of the starting issue, it should now start up properly.
If the lawn mower still won’t start after checking the battery, there may be other underlying issues that require further troubleshooting or professional assistance.
Check the Air Filter
Here is a step-by-step instruction on how to check the air filter if your Troy Bilt lawn mower won’t start:
- Safety first: Ensure that the lawn mower is turned off and the spark plug wire is disconnected to prevent any accidental starting.
- Locate the air filter: The air filter is typically housed in a plastic or metal box near the engine. Refer to your mower’s user manual for the exact location.
- Remove the air filter cover: Use a screwdriver or wrench to remove any screws or fasteners securing the air filter cover. Set aside the cover and any associated parts in a safe place.
- Inspect the air filter: Take a close look at the air filter for any signs of dirt, dust, debris, or damage. A dirty or clogged air filter can restrict the airflow to the engine, affecting its performance and starting ability.
- Clean or replace the air filter: If the air filter is dirty or clogged, it will need to be cleaned or replaced. If it is a disposable filter, simply replace it with a new one. If it is a reusable filter, you can clean it by gently tapping it against a hard surface to dislodge loose debris or by using compressed air to blow out the dirt. Avoid using water or liquid cleaners, as they may damage the filter.
- Inspect the air filter housing: While the air filter is removed, check the air filter housing for any signs of dirt, debris, or blockages. Clean out any accumulated debris with a soft brush or cloth.
- Reinstall the air filter: Once the air filter is clean or replaced, place it back into the air filter housing. Ensure that it is properly seated and aligned with the housing.
- Reattach the air filter cover: Position the air filter cover back over the air filter and secure it with the screws or fasteners. Make sure the cover is tightly secured to prevent any air leaks.
- Test the mower: Reconnect the spark plug wire and attempt to start the lawn mower. With a clean air filter, the engine should receive proper airflow, allowing for a better chance of starting.
If the lawn mower still won’t start after checking the air filter, there may be other underlying issues that require further troubleshooting or professional assistance.
How to Examine a Troy Bilt Fuel Filter
Here is a step-by-step instruction on how to examine the fuel filter if your Troy Bilt lawn mower won’t start:
- Safety first: Ensure that the lawn mower is turned off and the spark plug wire is disconnected to prevent any accidental starting.
- Locate the fuel filter: The fuel filter is typically located along the fuel line between the fuel tank and the engine. It may be positioned near the carburetor or within the fuel tank itself. Refer to your mower’s user manual for the exact location.
- Remove the fuel filter: Depending on the design, the fuel filter may be attached with hose clamps or quick-connect fittings. Carefully disconnect the fuel line from both ends of the filter. If necessary, use pliers or a screwdriver to loosen and remove any clamps.
- Inspect the fuel filter: Examine the fuel filter for any signs of debris, clogs, or damage. A clogged or dirty fuel filter can restrict the fuel flow and prevent the engine from starting.
- Clean or replace the fuel filter: If the fuel filter appears dirty or clogged, it will need to be cleaned or replaced. If it is a disposable filter, simply replace it with a new one. If it is a reusable filter, you can clean it by rinsing it with a suitable solvent or by blowing compressed air through it.
- Reinstall the fuel filter: Once the fuel filter is clean or replaced, reconnect the fuel line to both ends of the filter. Ensure that the connections are secure and tight.
- Check the fuel lines: While inspecting the fuel filter, also check the fuel lines for any signs of damage, such as cracks or leaks. Replace any damaged fuel lines as necessary.
- Test the mower: Reconnect the spark plug wire and attempt to start the lawn mower. If the fuel filter was the cause of the starting issue, the engine should now receive a proper fuel supply and start up.
If the lawn mower still won’t start after examining the fuel filter, there may be other underlying issues that require further troubleshooting or professional assistance.
How to Inspect a Lawn Mower Spark Plug
Here’s a step-by-step guide on how to inspect the spark plug if your Troy Bilt lawn mower won’t start:
- Safety first: Ensure the lawn mower is on a flat and stable surface, the spark plug wire is disconnected, and the engine is cool before starting any inspection.
- Locate the spark plug: The spark plug is typically located on the side or top of the engine. You may need to remove a plastic cover or spark plug boot to access it.
- Remove the spark plug: Use a spark plug wrench or socket to loosen and remove the spark plug from the engine. Carefully pull it straight out.
- Inspect the spark plug visually: Examine the spark plug for any signs of damage or wear. Look for:
- Fouling: If the spark plug is covered in black, oily residue, it may be fouled. This can occur due to excessive oil consumption or a rich fuel mixture.
- Deposits: If there are heavy deposits on the spark plug, such as white or brownish buildup, it may indicate an incorrect fuel-air mixture or the use of improper fuel.
- Wear: Check the electrode (the small metal tip) for any signs of erosion, pitting, or excessive wear. If the electrode is damaged or worn, it may affect the spark plug’s performance.
- Check the spark plug gap: Using a feeler gauge, check the gap between the electrode and the ground strap (the metal piece at the bottom of the spark plug). Consult your lawn mower’s manual for the recommended spark plug gap. If necessary, adjust the gap by gently bending the ground strap.
- Clean or replace the spark plug: If the spark plug is dirty, fouled, or worn out, it’s recommended to either clean or replace it. To clean the spark plug, use a wire brush or spark plug cleaner to remove any deposits or fouling. If cleaning doesn’t improve its condition, replace it with a new spark plug of the correct type and gap.
- Install the spark plug: Carefully thread the spark plug back into the engine by hand. Once hand-tight, use a spark plug wrench or socket to snugly tighten the spark plug. Be careful not to overtighten it, as it may damage the threads.
- Reconnect the spark plug wire: Slide the spark plug boot over the spark plug until it’s fully seated. Make sure it’s securely connected.
- Attempt to start the lawn mower: With all necessary maintenance steps completed, reconnect any safety features and try starting the lawn mower to see if the issue has been resolved.
If your Troy Bilt lawn mower still won’t start after inspecting and potentially cleaning or replacing the spark plug, it’s advisable to seek professional assistance or contact an authorized service center for further diagnosis and repair.
How to Inspect a Lawn Mower Ignition System
Here is a step-by-step instruction on how to inspect the ignition system if your Troy Bilt lawn mower won’t start:
- Safety first: Ensure that the lawn mower is turned off and the spark plug wire is disconnected to prevent any accidental starting.
- Locate the ignition components: The ignition system includes several components such as the spark plug, ignition coil, and ignition switch. Refer to your mower’s user manual to identify the specific location of these components.
- Inspect the spark plug: Remove the spark plug using a spark plug socket or wrench. Examine the spark plug for any signs of damage, such as a worn electrode, fouling, or excessive carbon buildup. If the spark plug is in poor condition, it may need to be cleaned or replaced.
- Clean the spark plug (if necessary): If the spark plug appears dirty or fouled but is still in good condition, you can clean it. Use a wire brush or spark plug cleaner to remove any carbon deposits or debris from the electrode. Ensure that the electrode gap is set to the manufacturer’s specifications using a spark plug gap tool.
- Check the ignition coil: Inspect the ignition coil for any signs of physical damage, such as cracks or loose connections. Ensure that the wiring connections to the coil are secure and free from corrosion.
- Test the ignition coil: Using a multimeter set to the resistance (ohms) setting, check the resistance of the ignition coil. Consult your mower’s user manual for the specific resistance values for your particular model. If the resistance readings are outside the acceptable range, the ignition coil may be faulty and require replacement.
- Inspect the ignition switch and wiring: Examine the ignition switch and wiring connections for any signs of damage or loose connections. Ensure that the wiring is intact and properly connected.
- Clean or repair any issues: If you notice any dirt, debris, or corrosion on the ignition components or wiring, clean them using a wire brush or contact cleaner. Repair or replace any damaged wiring or connections as necessary.
- Reassemble and test the mower: Once you have completed the inspection and any necessary repairs, reassemble the ignition components. Reconnect the spark plug wire and attempt to start the lawn mower. If the ignition system was the cause of the starting issue, the mower should now start properly.
If the lawn mower still won’t start after inspecting the ignition system, there may be other underlying issues that require further troubleshooting or professional assistance.
How to Test the Carburetor & Reinstall the Carburetor Bowl
Here is a step-by-step instruction on how to test the carburetor and reinstall the carburetor bowl if your Troy Bilt lawn mower won’t start:
- Safety first: Ensure that the lawn mower is turned off and the spark plug wire is disconnected to prevent any accidental starting.
- Locate the carburetor: The carburetor is usually positioned near the engine and is attached to the air filter housing. Consult your mower’s user manual to find the exact location.
- Remove the carburetor bowl: Use a wrench or screwdriver to loosen and remove the screws holding the carburetor bowl in place. Carefully lower the bowl and allow any fuel inside to drain into a suitable container. Take note of the orientation and position of any gaskets or O-rings.
- Inspect the carburetor bowl: Examine the inside of the carburetor bowl for any debris, sediment, or varnish buildup. If you notice any clogs or blockages, clean the bowl using carburetor cleaner and a small brush. Ensure that the bowl is clean and free from any obstructions.
- Check the carburetor float: The carburetor float is responsible for regulating the fuel level inside the carburetor. Gently move the float up and down to ensure it moves freely and isn’t sticking. If the float is damaged or sticking, it may need to be replaced.
- Inspect the carburetor jets: The carburetor jets are small openings that allow fuel to mix with air. Use a carburetor cleaner and a fine wire or compressed air to clean out any clogs or blockages in the jets. Ensure that the jets are clear and unobstructed.
- Reinstall the carburetor bowl: Place the cleaned carburetor bowl back into position, ensuring that any gaskets or O-rings are properly aligned. Tighten the screws securely but be careful not to overtighten and damage the threads.
- Reconnect fuel line and spark plug wire: Reattach the fuel line to the carburetor and ensure it is securely connected. Reconnect the spark plug wire to the spark plug.
- Test the mower: With the carburetor bowl reinstalled, attempt to start the lawn mower. If the carburetor was the cause of the starting issue, the mower should now start and run smoothly. Monitor the mower’s performance for any signs of fuel or air flow issues.
If the lawn mower still won’t start or has difficulty running smoothly after testing and reinstalling the carburetor, there may be other underlying issues that require further troubleshooting or professional assistance.
How to Check the Engine Oil Level
Here’s a step-by-step guide on how to check the engine oil level if your Troy Bilt lawn mower won’t start:
- Safety first: Ensure the lawn mower is on a flat and stable surface, the engine is cool, and the spark plug wire is disconnected before starting any maintenance.
- Locate the oil fill cap and dipstick: The oil fill cap is typically located on top of the engine and may be labeled “Oil” or have an oil can symbol. The dipstick is attached to the cap and is used to measure the oil level.
- Clean the area around the oil fill cap: Use a clean cloth or rag to wipe away any dirt or debris around the oil fill cap. This will prevent any contaminants from falling into the engine when the cap is removed.
- Remove the oil fill cap: Unscrew the oil fill cap counterclockwise and carefully remove it from the engine. Set it aside in a clean and safe place.
- Check the oil level: Insert the dipstick into the oil fill tube until it is fully seated. Then, remove it and observe the oil level on the end of the dipstick. The dipstick will have markings indicating the minimum and maximum oil levels.
- Assess the oil level: Check the oil level against the markings on the dipstick. If the oil level is below the minimum mark or significantly low, it may indicate a lack of oil in the engine. If the oil level is too high, it may be overfilled, which can cause problems as well.
- Add or drain oil if necessary: If the oil level is below the minimum mark, add oil to bring it up to the recommended level. Use the appropriate type and viscosity of oil as specified in the lawn mower’s manual. If the oil level is too high, drain some oil using a suitable oil drainage method or device until the level is within the recommended range.
- Reinstall the oil fill cap: Once the oil level is at the correct range, carefully screw the oil fill cap back onto the engine in a clockwise direction. Make sure it is tightened securely but not overly tightened.
- Clean up and reconnect: Wipe away any spilled oil and debris around the oil fill cap area. Reconnect the spark plug wire if it was disconnected for safety purposes.

Checking the engine oil level is an essential maintenance step, as proper oil levels are crucial for the engine’s performance and longevity. If the oil level is correct and the lawn mower still won’t start, it’s recommended to seek professional assistance or contact an authorized service center for further diagnosis and repair.
How to Test a Riding Lawn Mower Safety Switch
Here’s a step-by-step guide on how to test a riding lawn mower safety switch:
- Safety precautions: Before starting any maintenance or testing, ensure the riding lawn mower is on a flat surface, the engine is off, and the ignition key is removed. Also, engage the parking brake for added safety.
- Identify the safety switches: Riding lawn mowers have multiple safety switches that may include the seat switch, blade engagement switch, brake/clutch switch, and others. Refer to the mower’s manual or consult the manufacturer’s documentation to locate the specific safety switches on your model.
- Inspect the switches and wiring: Visually examine the safety switches for any visible signs of damage, such as broken or frayed wires, loose connections, or corrosion. If you notice any issues, repair or replace the damaged parts before proceeding with the testing.
- Test the seat switch: The seat switch ensures that the operator is seated on the mower before it can start. Sit on the mower’s seat and attempt to start the engine. If the engine fails to start, it could indicate a faulty seat switch. To test it, try bypassing the seat switch by temporarily disconnecting the wires connected to the switch and connecting them directly together. If the engine starts, the seat switch may be defective and require replacement.
- Test the blade engagement switch: The blade engagement switch ensures that the blades are disengaged before starting the engine. Turn the ignition key to the “ON” position without starting the engine and attempt to engage the blades. If the blades do not engage, it could indicate a faulty blade engagement switch. Test the switch by using a multimeter set to the continuity or resistance mode. Disconnect the wires from the switch and connect the multimeter probes to the switch terminals. Press or engage the switch, and the multimeter should indicate continuity or a specific resistance value. If there is no continuity or the resistance value is not within the specified range, the switch may be faulty and require replacement.
- Test the brake/clutch switch: The brake/clutch switch ensures that the brake pedal or clutch is fully engaged before starting the engine. Depending on the mower’s design, this switch may be located near the brake pedal or integrated with the clutch mechanism. Follow the manufacturer’s instructions to test the switch, which may involve using a multimeter to check for continuity or resistance when the brake pedal or clutch is engaged.
- Reinstall and secure all connections: Once you have completed testing the safety switches, reconnect any disconnected wires and ensure all connections are secure. Check for proper alignment and positioning of the switches.
Remember, if you are uncertain about any step or lack experience working with electrical components, it’s recommended to consult a qualified technician or contact the manufacturer’s customer support for assistance. They can provide guidance specific to your riding lawn mower model and ensure proper troubleshooting and repairs.
Troy Bilt Lawn Mower Won’t Start FAQ
Frequently Asked Questions (FAQ) – Troy Bilt Lawn Mower Won’t Start
Q: Why won’t my Troy Bilt lawn mower start?
A: There can be several reasons why a Troy Bilt lawn mower won’t start. Common causes include issues with the battery, fuel system, spark plug, ignition system, or engine oil level.
Q: How do I know if the battery is the problem?
A: If your lawn mower doesn’t make any noise or show any signs of power when you turn the key, the battery might be dead or low on charge. Check the battery connections and use a multimeter to test the voltage.
Q: What should I do if the fuel filter is clogged?
A: A clogged fuel filter can prevent fuel from reaching the engine. Inspect the fuel filter for any dirt or debris. If it is clogged, replace the fuel filter with a new one.
Q: Can a dirty air filter cause starting issues?
A: Yes, a dirty air filter can restrict airflow to the engine and affect its performance. Inspect the air filter and clean or replace it if necessary.
Q: How often should I replace the spark plug?
A: The spark plug should be replaced according to the manufacturer’s recommendations, typically every 100 hours of operation or once a year. If the spark plug is worn, corroded, or damaged, it may cause starting problems.
Q: Why is the engine oil level important for starting?
A: The engine oil lubricates and protects the internal components of the engine. If the oil level is too low or if the oil is old and dirty, it can cause engine problems. Check the engine oil level and top it up if needed.
Q: How can I check the ignition system?
A: Inspect the ignition system for any loose or damaged wires, connections, or ignition components. Use a spark plug tester or a multimeter to check for spark at the spark plug when the engine is cranked.
Q: Are there any safety switches that could be causing the issue?
A: Yes, many lawn mowers have safety switches that prevent the engine from starting if certain conditions are not met. Verify that the seat switch, blade engagement switch, and other safety switches are functioning properly.
Q: What if none of the troubleshooting steps solve the problem?
A: If you have gone through the troubleshooting steps and the lawn mower still won’t start, it may be best to consult a professional technician or contact the Troy Bilt customer support for further assistance.
Note: The specific troubleshooting steps and solutions may vary depending on the model and type of Troy Bilt lawn mower. Always refer to the manufacturer’s manual or seek professional advice when in doubt.


Why is it important to test the safety switches?
Safety switches are designed to prevent the lawn mower from starting in unsafe conditions. If any of the safety switches are faulty or not engaged properly, they can prevent the engine from starting. Testing the safety switches helps ensure they are functioning correctly and can help identify the source of the starting problem.
Should I attempt to repair the mower myself if I’m not familiar with lawn mower engines?
If you lack experience in lawn mower repairs, it’s best to consult an authorized Troy Bilt service center or a qualified technician to avoid potential damage and ensure proper diagnosis and repair.